Thursday, April 12, 2007

On Tintock Tap …….

5 comments
I’ve been on holiday from work this week, staying with my parents in south Lanarkshire. The scenery is beautiful, weather great, and as usual, it's going to be a wrench to leave and head down south again tomorrow.

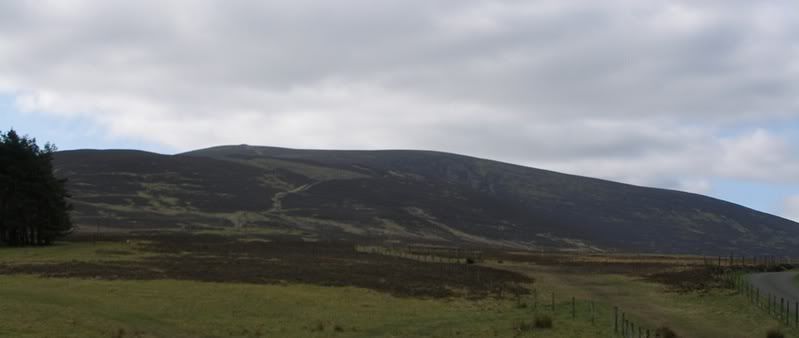
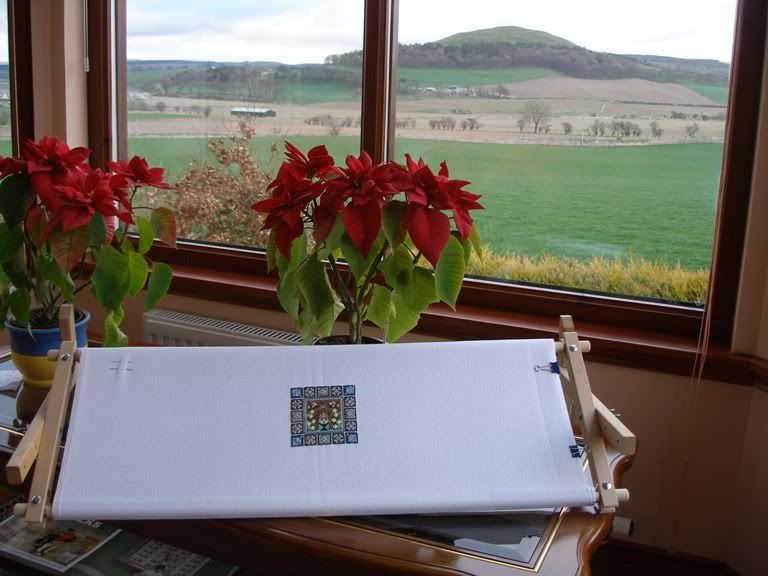
This is the view I have to look out on while doing my stitching –


The hill is Quothquan Law. Behind me and beyond a row of houses and some fields is Tinto.


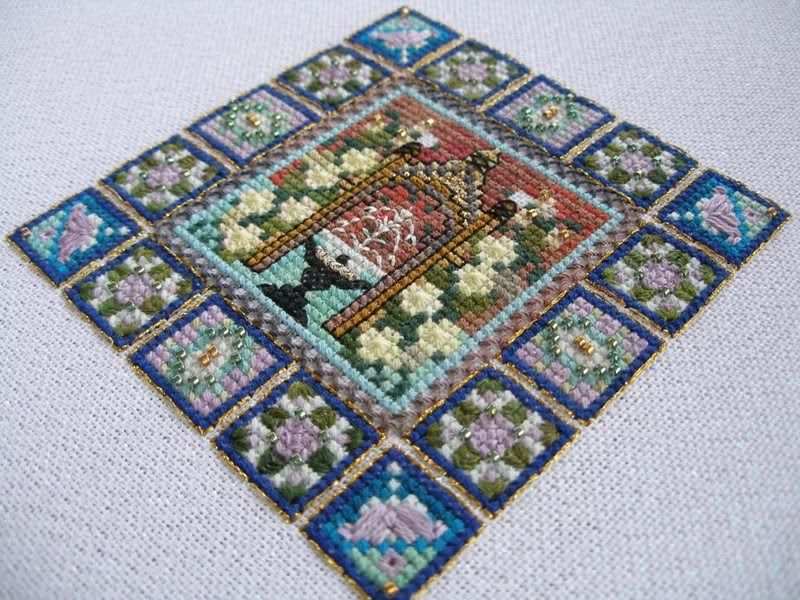
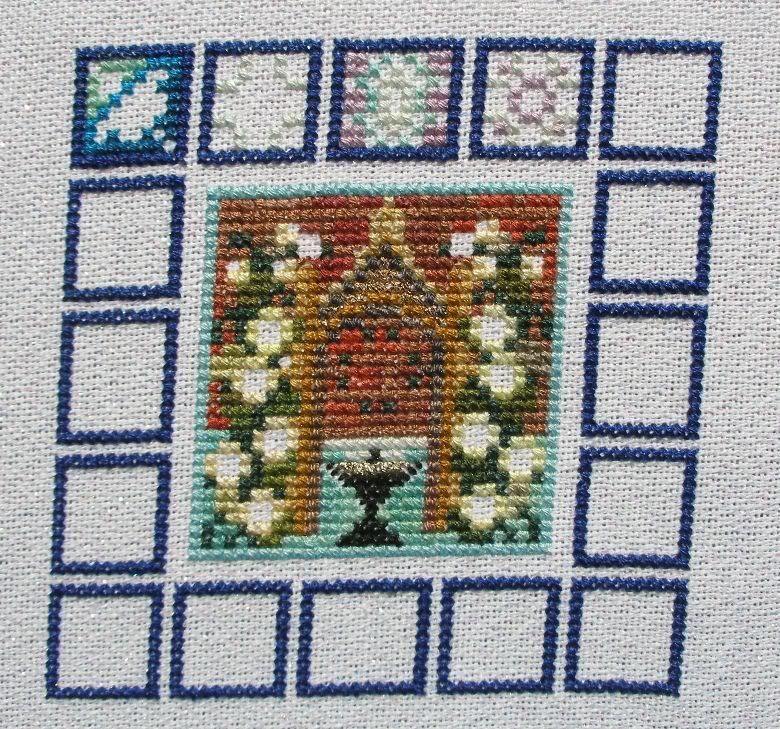
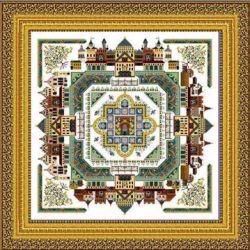
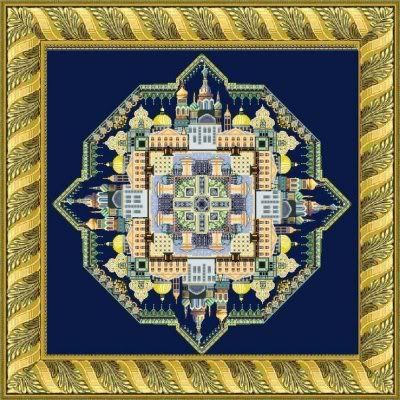
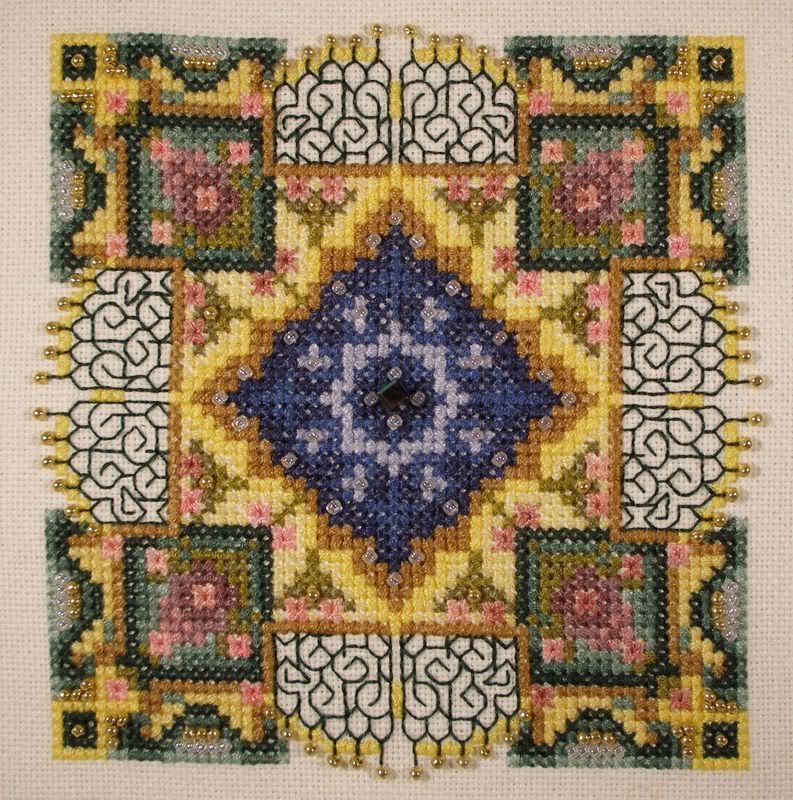
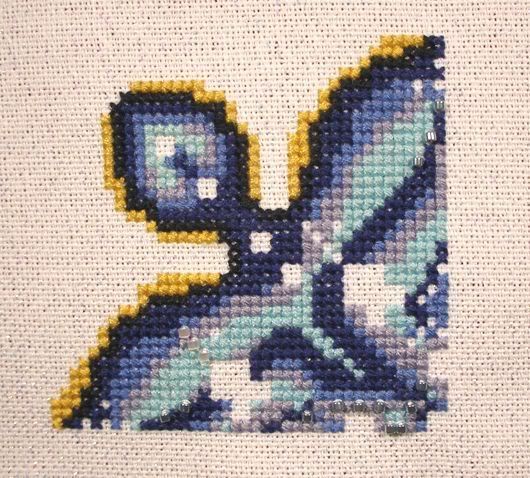
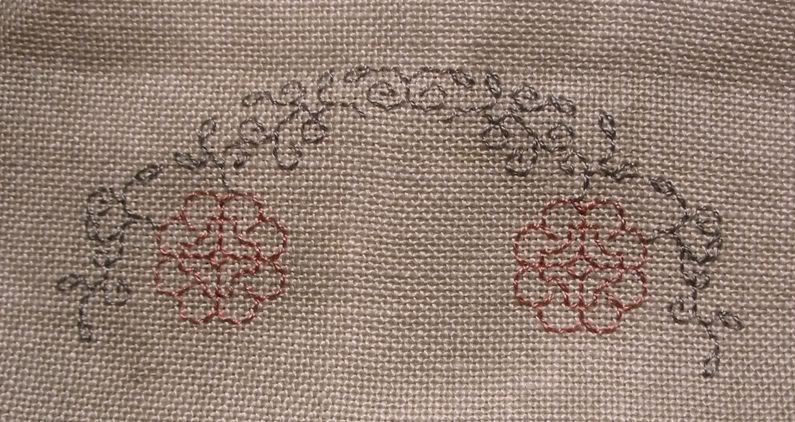
The stitching you may have noticed is Medieval Town Mandala. Despite having part 2 of St Petersburg to work on, I didn’t particularly want to dismantle and transport my huge scroll frame, so MTM it is this week. I’ve now completed part 1, despite a little confusion over the backstitching (despite looking at both colour and black and white charts, I still wasn’t completely certain how it worked). The fountain also took me 3 goes.

Anyway, I’m now making excellent progress on part 2, after checking other stitchers’ work on the Internet to be sure it really does come so close to part 1. I’m not entirely certain of the benefit of the gold backstitching round the blue flower beds in part 1 when the gold border, although a different shade of gold, lies so close in part 2.


Finally, the doting mum takes over as we climbed Tinto this morning. It’s the first time my 6 year old son has done anything like this and I’m very proud of him!


It’s the cairn on top of Tinto that the Tintock Tap rhyme refers to.

Tuesday, April 03, 2007

March roundup

3 comments
There are a few things I've been stitching that I haven't got round to posting photos of, so I thought I'd sum things up here.

Watergarden - I haven't stitched this since the beginning of March and am going temporarily retire it from my WIP list as others will be taking priority.

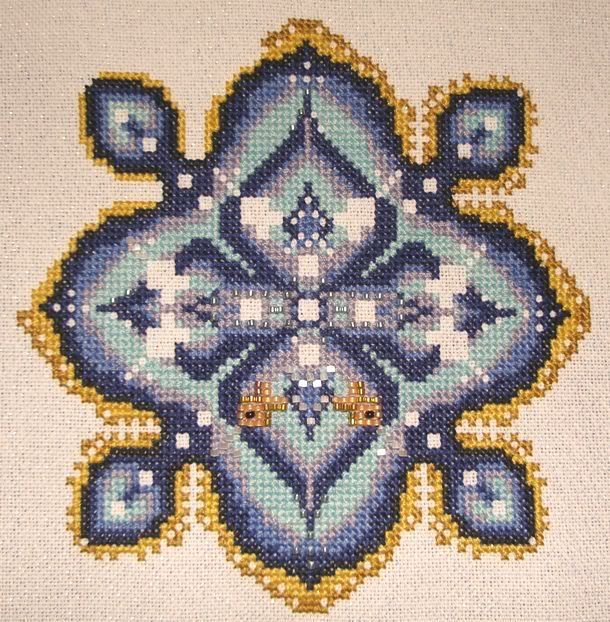
One of the things with all Chatelaines is the amount of beading involved. I didn't fancy the idea of leaving it all to the end, so decided that I'd add the Delicas in stages. At the end of February, I reached a point where I'd finished the central blue section and started the surrounding border, so I decided it was time to do a little beading.


Part 1 of St Petersburg became available at the beginning of March and I was really pleased to complete the stitching and add the Delicas on schedule, even with a week left over at the end of the month! My monster scroll frame made an enormous difference.


Part 2 was released last weekend, so I'm hoping to get started this evening!

In the last week of March, I picked up Medieval Town Mandala again. Actually, I completely restarted it having decided that I really wanted to do it on opalescent fabric. The amount I'd completed previously was minimal, so it wasn't a problem. I'm really pleased with the progress I've made to the extent that I've almost finished part 1 and the photo below is becoming out of date!


I'm also very pleased with the progress I've made on Nova over the last month. In October, I'd completed the first 3 blocks. In March, I added another 7!


On the down side, I haven't been able to keep up with Carol Tinson's Huswif as I would have wished. Part 3 is due this month, and I've only just finished part 1. This one has been my lunch time stitching at work where I've been feeling a bit stressed and not much like stitching recently. Sometimes even, it feels like the stitching adds to the stress. It gets confusing when I actually enjoy doing it yet feel stressed by it at the same time. So I think I may take a break from the lunchtime slot for now. Maybe when the weather is better, I'll get out to the park at lunch time and do a little stitching there. Sorry I don't have an updated picture!

Wednesday, March 28, 2007

Tin finish

5 comments
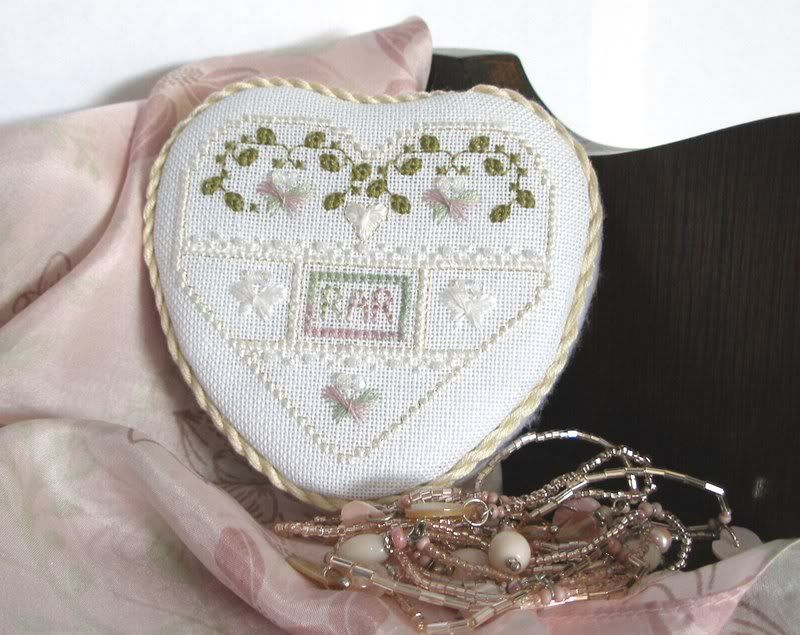
Recently I finished "Lorri's Heart" Tin for a friends birthday.


It looks very pretty and I'm really pleased with the way it turned out as it's the first piece I've finished as a tin top. My friend really liked it too.

I got the design as a kit with everything I needed, including the tin. The first step was to stitch the top as normal. At this point I discovered some really horrible silky thread in the kit that was absolutely awful to stitch with. I'm not even completely certain what it was - in one place it's referred to as White Silk Mori and elsewhere as Creme Silk from Needle Necessities.

Whatever it was, it was really horrible to stitch with - the strands kept separating and slipping out of my needle and turning into a yucky fluffy tangle! However, as I'm fairly new to stitching with silk, I've no other white silk in my stash. I therefore persevered as I wanted to retain the effect of the sheen of the silk.

I also found that the chart could potentially be misleading as one of the symbols used for the beads, a dot, was also used to indicate the position of the Rhodes butterflies on the chart.

However, despite these drawbacks, I think it was certainly worth the effort.


Finishing the tin was fairly simple, if a bit fiddly.

You mark the shape of the tin on to a piece of card and cut it out. The stitched piece is then attached to the card and then this stuck to the tin. However, between the card and the stitching you need some padding - I used a couple of layers of white felt. The stitching is then attached to the padded card with a mixture of glue and lacing to get a nice firm fit and ensure none of the edges of the fabric show round the edges of the card.

Finally, you can run a length of fine cord around the top of the tin to hide the area where the tin and the stitched top meet - it makes a much neater finish.

You can also cover other parts of the tin. As the tin was red, I covered those parts of the tin top that would still be visible after the stitched top was added with a layer of white felt. A finer, better quality fabric or ribbon would give a finer, more professional finish, but I was quite happy with the felt. Another time, I'll try something different.


Thanks to everyone who commented on my monster scroll frame! It really has made an enormous difference to my stitching and have finished part 1 of St Petersburg (photos to come soon).

Trish asked about the tension of the fabric on the rods - I confess that is an area needing fine tuning! The tension of the fabric is not consistent across the width of the frame. However, so far, it hasn't annoyed me sufficiently that I've done anything about it. I suspect that the curtain tape hasn't been attached to the rods in a straight enough line. Either I'll have to loosen off everything and re-attach the tape, or I might try rolling an extra piece of fabric round the rods beside my stitching fabric to tighten things up at bit.

Anyway, flushed with enthusiasm over this success and the luxury of being able to use both hands properly while stitching (no man-handling a scroll frame now it's on a stand), over last weekend, I drilled 5mm holes in the side bars of my 30 inch scroll frame (on which I have Medieval Town Mandala) so that I could attach the same stand/legs to this frame too. I'm not sure that I'm very good at drilling holes in a straight line, but the end result works a treat and I'm making excellent progress on MTM while waiting for part 2 of St. Pete.


Your Element Is Air

You dislike conflict, and you've been able to rise above the angst of the world.
And when things don't go your way, you know they'll blow over quickly.

Easygoing, you tend to find joy from the simple things in life.
You roll with the punches, and as a result, your life is light and cheerful.

You find it easy to adapt to most situations, and you're an open person.
With you, what you see is what you get... and people love that!

Friday, March 23, 2007

Monster scroll frame

7 comments
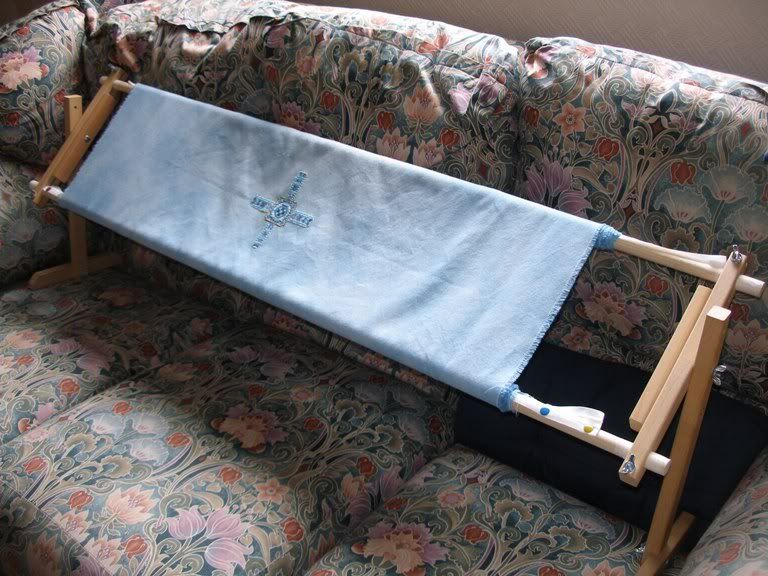
So, the challenge was, how could I get a scroll frame big enough for my fabric for St Petersburg? 411 stitches is almost 30 inches on 28 count fabric, and then you've got to add on at least 3 inches around the edges!

I know it's possible to buy frames of 40 inches and more, but I haven't seen any online in the UK and it just didn't seem worth buying that sort of thing from overseas. After seeing a post on a message board, I decided to make one myself.

At home I have a table/lap frame (an ebay win) which I didn't really use as the frame part of it hasn't been a good enough size for the pieces I've been working on recently. If I could make myself some long scroll rods for it, then it would be perfect to use for St Pete.

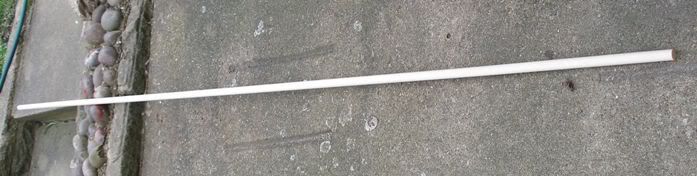
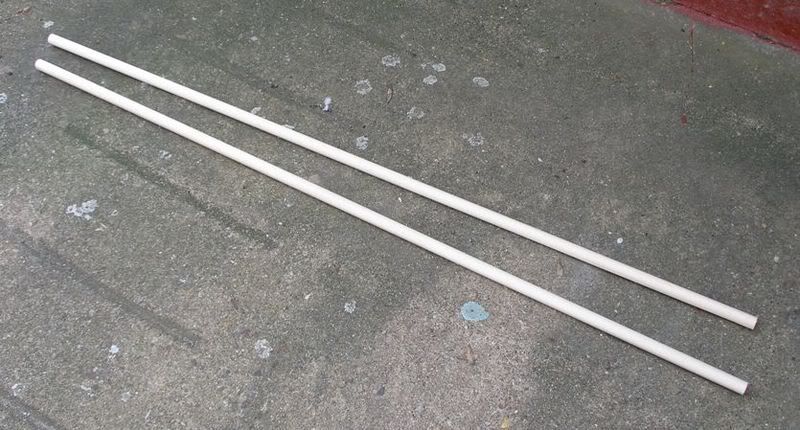
So, first I checked the diameter of the rods currently in the frame (19mm) to work out roughly what I'm after. Then off to my nearest B&Q where I bought a 2.4 metre long piece of 18mm pine doweling.


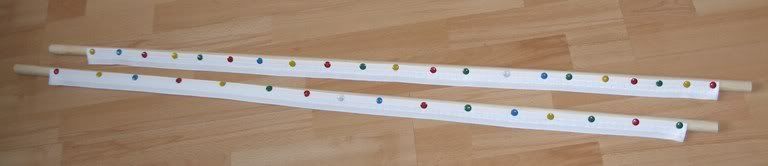
On the way home from B&Q, I popped into Dunelm and bought 3m of 1 inch curtain header type of tape.

On the living room floor, I measured the rod and marked the middle. Next, out to the garden and a rummage in the garage (with advice from husband) to find a small saw and cut the dowel into two pieces.


Back inside again, I dug out a box of coloured drawing pins, cut the curtain tape into convenient sized lengths, fastened the tape to the rods with the drawing pins. Hammer required I realised after my thumbs got rather sore pressing the drawing pins into the first rod!


Things were looking good and I was starting to get excited!

Out with the sides and legs of the frame. I'd suspected that the rods might be slightly loose fitting in the frame, and I was right. They were so loose, they wouldn't stay in! So, out with the masking tape and a few layers round the ends of the rods had them fitting perfectly!

Finally, out with St Pete and some thread and I stitched the fabric to the curtain tape.

What do you think of the end result? Personally, I'm dead chuffed! And I can't believe I have a scroll frame almost as big as my couch! Oh, and St Pete now has significantly more stitching on it than in the picture!

Thursday, March 08, 2007

Stitchin' Pretty

2 comments
This is what I love about Carol Tinson's designs - you're challenged as a stitcher to learn new stitches and techniques in order to complete her beautiful designs.

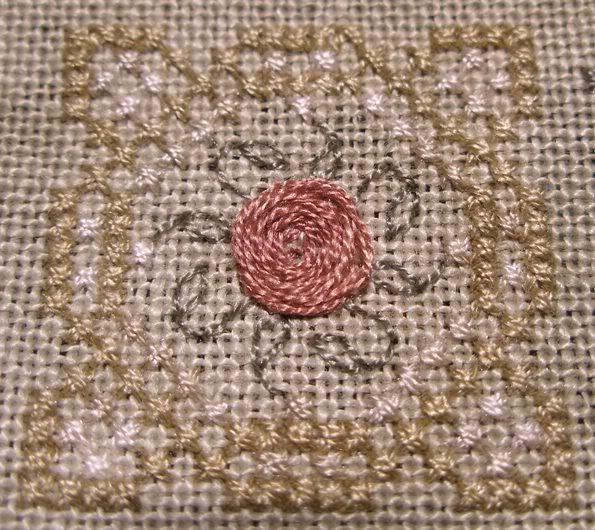
My current favourites in the Mystery Huswif are the Spiders Web Roses.

Spiders Web Rose (Carol Tinson)
You can see instructions at http://www.hand-dyedfibers.com/spider.html

Before I completed my first one, I was a little worried about what would happen if my thread got twisted while I was making the rose. I railroad all my top stitches and sometimes the bottom ones too (depends how the thread is behaving), and I didn't want to spoil the effect of the roses with twisted thread. However, I soon realised that it really doesn't matter. In fact, a little twisting can add extra texture to the rose and even improve the look of the end result. The main thing to do when stitching these stitches is to have plenty of thread on your needle!

The main point with this stitch is not to get your tension too tight - then I think you would have difficulty with the texture and overall look of the rose.

I've nearly finished part 1 now, although part 2 arrived by email earlier this week. Here's where I've got to so far.

Carol Tinson's Mystery Huswif
The photograph makes the colours look much lighter than they are in real life.

I've switched around some of the colours - I think the HDF Hazelnut is my least favourite. I've also left out the alphabet in the centre but have one or two ideas for other things to put in that band, as well as in the alphabet bands of part 2.

I just have to finish the leaves on the right hand rose and a herringbone band below, then I'll be ready for part two!

Ooh - and I've even managed a stitch or two on Nova this week!

Monday, March 05, 2007

To rotate or not to rotate?

1 comments
Or should the title of this post be Obsessive Stitching? It's just the simple problem of how can I find enough time to stitch all the beautiful designs I want to stitch?

I don't think I'm really a rotation stitcher. I'm not keen on the idea of having to stitch a set number of hours/days/weeks on one piece before switching to something different. I'd much rather just be able to stitch what I feel like working on at any given time. So I don't think I'll start a rotation.

Maybe I'm more of a one-at-a-time stitcher - I'll start one thing and stitch it until it's finished before I start something else.

But if that's the case, then how did I end up with so many WIPs? And when am I going to find the time to work on them all, let alone actually finishing?

For example, take Nova by Genny Morrow.

Genny Morrow's Nova
I started this last October when I was up in Scotland staying with my parents, completed 3 squares, but I haven't done a stitch on it since and half the threads have walked .......

Nova, at least, should be easy to fix - how difficult can it be to stitch one square per week? (Or one evening per week if I'm feeling ambitious.)

Now I just have to worry about all my other WIPs .......

Monday, February 26, 2007

Kitting a Chatelaine

4 comments
This is a subject which has been occupying me faaaar too much over the last few weeks, so I thought I'd get it all down online.

Many Chatelaine designs use a variety of silk threads, both solid colours and varigated. As they're silk, this significantly adds to the cost of the project. Fortunately, Martina Weber also publishes a DMC conversion for these projects so that stitchers can choose how much they wish to spend or swap out those threads they dislike. The question of buying beads also needs to be considered as Martina normally uses Delica beads, but also produces a conversion to Mill Hill.

I've now got 2 Chatelaine projects started and will be adding a third fairly soon. Each of them has been kitted in a different way.

Project number 1 - Watergarden
Watergarden uses quite a lot of DMC threads, as well as silks, so is easier than for many other designs to get hold of all the materials. However, for this design, I chose the oprion of making a simple purchase from European Cross Stitch for all the silk threads and Delica beads. This really was the simple, easy option.

Chatelaine's Watergarden WIP photo
Project number 2 - Medieval Town Mandala
I started this project on my birthday but have made little progress to date as I discovered I have a couple of threads missing. Other than that, I have all the silk threads for this project, no DMCs at all. In this case, the silks were all collected as Christmas and birthday presents from my family. I emailed them a list of the threads needed and suggested a couple of online shops to buy from. From my point of view, this worked our fine, but I have now discovered a couple of threads missing and I haven't been able to find an online source in the UK. I've now emailed European Cross Stitch who have the necessary threads and will be able to send me them.

For the beads, I bought several of the colours required on ebay, but have one colour I don't have yet. I know of one or two online shops that stock this bead colour, but it seems a bit ridiculous to pay more in postage that the actual price of the beads!

Chatelaine's Medieval Town Mandala I haven't made much progress stitching this one as I discovered early on that I needed to use the threads I'm missing. I could keep going, but would prefer not to as I don't want to risk mistakes.

Project number 3 - St Petersburg White Nights
This will be a 12 month project with the chart issued in monthly installments. The materials list and DMC conversion were issued in early February and the first chart will be issued on 1st March.

For this project, I've decided to go with the DMC conversion rather than use the majority of the silks. That part at least is straightforward! The problem really is to decide which of the varigated silks to keep and which to swap for DMCs. There are some online shops and thread producers who show sufficiently detailed photos of the thread to see just how much varigation there is. Even then, it's still not as good as having the actual threads in your hand. However, I have made my choice on this basis, and I'll see how it goes.

For the beads, I've given in and simply ordered the bead pack from European Cross Stitch.

Chatelaine's St Petersburg White Nights

Although I've mentioned European Cross Stitch several times already, I haven't mentioned the different options they offer for kitting a Chatelaine. For St Petersburg, they offer full kits with all fabric, threads and beads. You can get a kit without the fabric, without the solid colour silks, or just the bead pack. On other designs, you can order only the silk threads. I see that Needlecraft Corner too offers a similar service for some Chatelaine designs, althout I've never bought from them at all.

I'm rapidly coming to the conclusion that, for me, European Cross Stitch is the answer. In future, I may just opt for a full kit minus solid coloured silks and fabric - the other ways are too much hassle!

Monday, February 19, 2007

It's a mystery!

2 comments
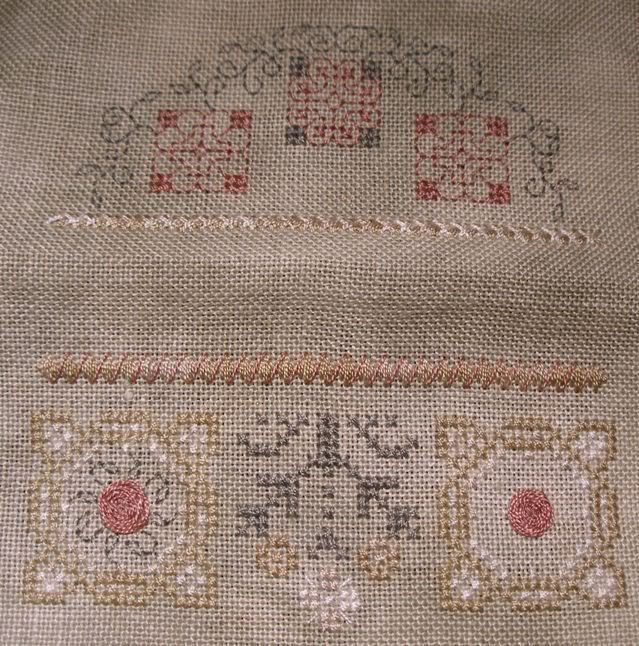
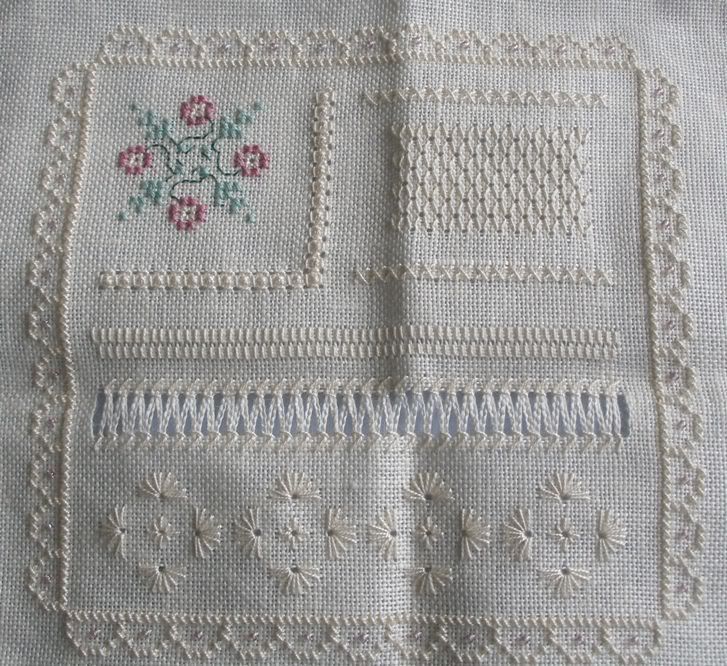
This year, I've joined my first mystery group with Carol Tinson at Heirloom Embroideries. The mystery for the first half of this year, is a sampler which can either be stitched as a sampler with a drawn thread border, or finished as a huswif. I've chosen to work on the huswif as I've never made something like that before.

If you don't know what a huswif is, it's a kind of old fashioned, stitched, folding sewing case. There are some lovely photos of a sailor's huswif here (front) and here (back). Modern huswifs have also been designed by the Needle's Prayse and Sampler Cove (see the Quaker Huswif and Today's Heirloom Collection).

The reason it's a mystery is that when you start, you don't know what the design will look like. As you go along, parts of the design are revealed, but only those that you're currently working on, so that it's not until you complete the design that you know what it looks like! The risk is that you may not like the final design.

I stitched a number of Carol Tinson's designs last year, and I like most of her designs, I felt the risk of not liking the mystery design was fairly minimal.
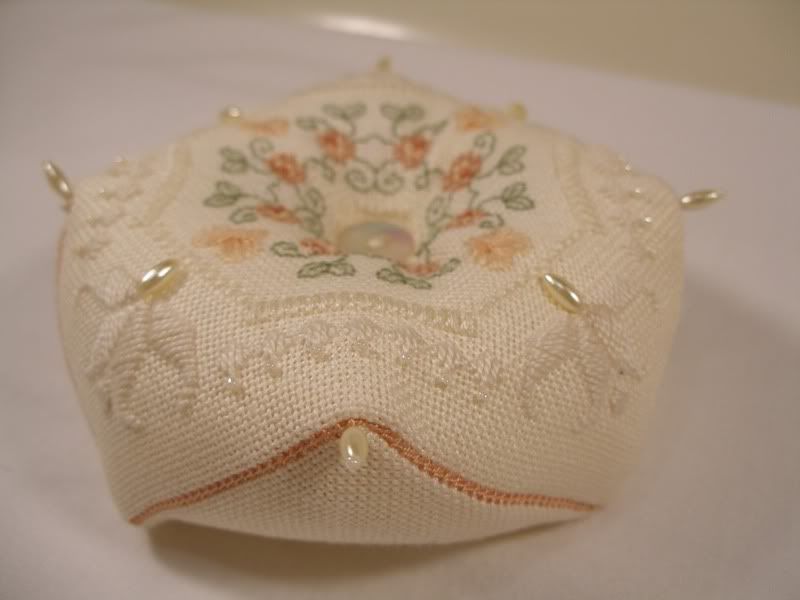


Peachy biscornuMy favourite - Carol's Peachy biscornu

In joining the mystery group, I paid for both the chart(s), instructions and all the materials required. Carol usually offers excellent value for money, so I was quite happy to do so.

The first installment arrived round about the 7th February and I was certainly not disappointed! My pack contained an introductory letter, full and detailed instructions for this part of the design, a chart for this installment as well as materials - Hand Dyed Fibres silk threads by Vikki Clayton, a one-off hand dyed linen from Polstitches and a little gold needle.
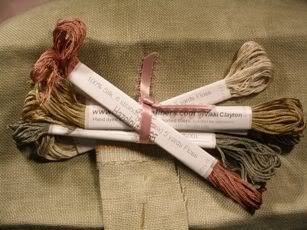
My first step was to oversew the linen using my sewing machine to stop it fraying while I'm stitching. By the middle of last week, after finishing 4 Wishes, I was ready to get started.

As usual, Carol's instructions are very comprehensive and beautifully presented and laid out. The variety of stitches used looks intriguing and will offer some challenge to achieve.

The colours are all beautiful in antique green, red/pink and gold. The fabric complements the threads very nicely, varying in colour from similar to the HDF Verdigris to more of a parchment colour. I'll be very interested to see the effect of the shading of the fabric as mine seems to be fairly dark at the top and the threads don't stand out particularly.

I've also found the Vikkii Clayton silks and the linen very luxurious to stitch with - they feel wonderful in my hands. I'm using silk on other projects (my Chatelaines) they don't feel nearly so good! The little gold needle too just seems to add to the luxury. So a good experience so far.

My only small small gripe is the alphabet band which may be continued through the design. I'm just not particularly keen on alphabet samplers. However, it's early days and far too soon to judge without seeing any more of the design.

Now I just need to remember to go and pay my February installment .......
Friday, February 16, 2007

Couldn't resist this one .....

0 comments
You scored as Luna Lovegood. You're an extreme introvert and because of this, are also a deep thinker. You ponder things others would never dream of pondering and stand with your beliefs without backing down. You find it more valuable to daydream than to socialize, because there's so much more going on in your head than others'. Most people don't understand it, but you seem to prefer it that way.

Luna Lovegood

78%

Albus Dumbledore

72%

Ron Weasley

69%

Sirius Black

69%

Remus Lupin

66%

Hermione Granger

66%

Neville Longbottom

59%

Oliver Wood

53%

Lord Voldemort

53%

Severus Snape

53%

Bellatrix Lestrange

47%

Percy Weasley

25%

Harry Potter

19%

Draco Malfoy

19%

Harry Potter Character Combatibility Test
created with QuizFarm.com

Oooh - just noticed I'm more like Lord Voldemort that Harry Potter! At least I'm more like Remus Lupin that Voldemort - kind of makes up for it!

Wednesday, February 14, 2007

A finish!

3 comments
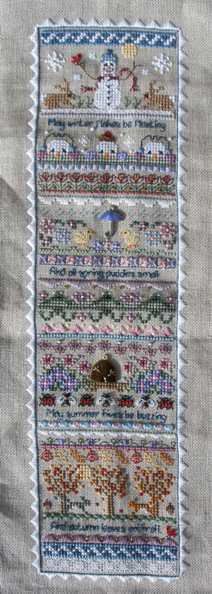
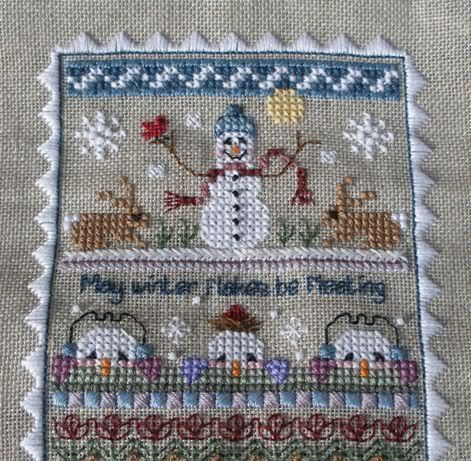
I was really pleased over the weekend to finish my ‘4 Wishes’ from Just Nan.

I started this piece full of enthusiasm last August, but ran out of steam towards the end of September before I’d even finished the winter section. I picked it up again at the start of January and have been working on it regularly in my lunch hours at work. (Yes, I am sad enough to take stitching to work with me, breaks up a boring, unfulfilling day!)

I made one or two changes to the charted design, firstly by stitching the white border using 3 strands of B5200. Looking back, I think this was due to inexperience on my part as I had not done much stitching on linen prior to August. Looking at the design now, I know that 2 strands would have been enough.

My second change was to alter one of the two squirrels in the autumn section to a more red colour using DMC3826. Red squirrels are native to the UK and now under considerable threat from the American greys. The Forestry Commission has some interesting information on the red squirrel here and includes information on where it is possible to see reds. Most of the sites listed are in Scotland, but I know that the grey squirrels are encroaching further and the reds face serious threat. Hence my wish to include a red squirrel in my 4 Wishes.

In terms of my stitching experience, I found it at times frustrating to be constantly changing thread colours. Any one thread might only be used for a small number of stitches in one of the seasonal bands and each season used a different range of colours - not a cost-effective use of thread. I’m sure this design could be stitched just as constructively and produce an equally lovely result through using fewer colours.

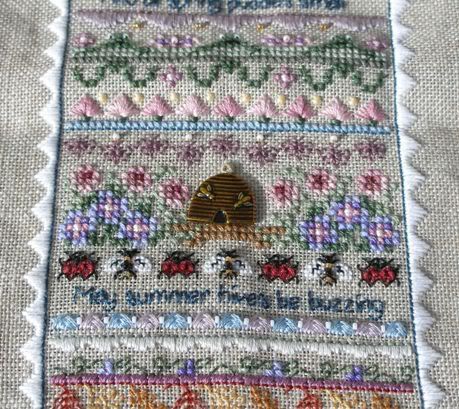
Although I like the umbrella and bee hive charms, I was disappointed in the beads to be added to the design. The beads included in the embellishment pack are tiny and I’m not certain that they really add anything to the overall design. In my view, if embellishments are to be added to a design, they should add to the overall effect and be visible in the finished item. I'm not sure that this is the case with the beads used here - too many of them just disappear into the background and add little to the overall effect.


In the finished design, I'm also slightly disappointed in the effect of the fabric colour. A lot of the threads used are pastel colours and I'm not convinced that they stand out enough on the fabric.


Overall, I enjoyed stitching this design, particularly after I picked it up again in January. I enjoyed the variety of stitches used, although it did take a little while to get used to the linen. However, after finishing spring I did start to get a little bored – once you get that far, there is little new challenge to be faced in completing the design.


Winter/Spring


Summer/Autumn

40 years ago on Monday ........

0 comments
Your Birthdate: February 12

You're a dynamic, charismatic person who's possibly headed for fame. You tend to charm strangers easily. And you usually can get what you want from them. Verbally talented, you tend to persuade people with your speaking and writing. You are affectionate and loving, but it's hard for you to commit to any one relationship.

Your strength: Your charm

Your weakness: Your extreme manipulation tactics

Your power color: Indigo

Your power symbol: Four leaf clover

Your power month: December


I got these ........ and these ........

and lots of other lovely gifts! My husband also organised a surprise party for me which really was a complete surprise. So thanks to everyone who came to the party, particularly my mum, dad and sister - I really appreciate it!


Thursday, February 08, 2007

Enlarging PDF charts

0 comments
After downloading your Chatelaine chart, the first task that faces you is to print it out. If you simply print the relevant pdf document, you'll end up with a chart which is unreadable, except with a magnifying glass. The trick with the pdf file is to enlarge the design using Adobe Reader's snapshot tool and either print the snapshot immediately, or copy the enlarged section to another (word processed) document. Instructions and advice on enlarging charts can be found at the Chatelaine bulletin board on ezboard. The discussion is also added to as new versions of Reader become available.

Additionally, if you join one of the Chatelaine groups on Yahoo, such as Chatelaine Design Support, then instructions can also be downloaded from there. If you still have problems, then both at ezboard and on Yahoo, you'll find a bunch of friendly stitchers more than happy to help.

I believe that the way in which Martina supplies her designs as pdf documents that you can enlarge so readily is very good. Many of the paper based charts you can buy are so small that, although still readable, they can make it harder for you to follow the chart. The advantage of these pdf based charts is that it is entirely up to you how large you print the chart. Of course, the disadvantage is the number of pages you end up printing the chart out on.

However, the biggest disadvantage of these pdf based charts is that it can be incredibly fiddly and time consuming working out exactly how you do want to print the chart and how large you want the symbols to be. You're also printing each page of the pdf document on to multiple sheets of paper and need to make sure you keep track of how all these pages fit together - no small task! This makes printing charts very complicated and heavy going for those who aren't so familiar with the workings of a pc.


But - don't be discouraged - it really is worth it! If you do have problems printing out your chart - come on to ezboard or the Yahoo group and just ask!

I've printed out my chart slightly larger than I would normally use a chart and , for the first time, I'm using a marker pen to mark off stitches as I do them - the larger chart gives me more space to do this without making a mess of the rest of the chart. So far it's working well.


To be continued ...........

Edited at 5.20pm

It's just been posted on ezboard that one contributer has just written some new instructions for enlarging charts with Adobe Reader 8 - see here for the instructions - and thanks to the person who wrote them!

Tuesday, February 06, 2007

Chatelaine for beginners

0 comments
Last week, I started Watergarden by Martina Weber of Chatelaine Designs.


It really is a lovely design, with beautiful shades of blue. It will be my first large Chatelaine design, although I have completed one of her freebies, Tiny Rose Garden. Watergarden is considerably larger than the freebie, at 237 x 237 stitches, working out at 14.8 x 14.8inches stitched over two on 32 count fabric.


I bought my chart directly from Martina Weber, the designer, via her website, Chatelaine Designs. This is an instant access chart where, after payment, you are sent a hyperlink to the area of the website to download the chart. A password is also provided. At the time when I purchased my chart, Martina was having problems with her ISP and was in the process of moving to a new server. She warned me initially of the problems she was having and when the link she sent me didn’t work, I contacted her. She couldn’t have been more helpful in ensuring I got my chart, even sending a copy by email and following up with a new download location.

The file I received was a zip file containing 5 pdf documents and a jpg image. To view the pdfs,
Adobe Reader is normally required. The jpg image can be viewed a number of ways, through image viewers, web browsers or even by pasting into a word processed document. The files are:


  • General instructions

  • Materials list

  • Black and white chart

  • Colour chart

  • Introductory note

  • Image of the design


The general instructions include any detailed instructions for specialist stitches to use and for beading.

Unlike many Chatelaine designs, Watergarden uses many DMC threads as well as silk thread from Needlepoint Inc, Caron Collection, Thread Gatherer and Rainbow Gallery Petite Treasure Braid. The design also requires 11 colours of Delica beads, and two shades of Swarovski crystals.

Materials lists for all Chatelaine designs can be viewed at the
Chatelaine Supply Lists website. The American distributor for Chatelaine Designs, European Crosstitch Company, also supplies kits for those designs available.

It is possible to use DMC threads for this design rather than the Needlepoint Inc silks as the conversion is given with the materials list. In my case, however, I've chosen to follow Martina's recommendation and use the NPIs as I've never used them before. My fabric is Zweigart 32 count Murano - Lurex fabric in pearl flecked white (bought from
Sew and So). I bought the beads and silks threads from European Crosstitch Company.


Week 1 WIP.


To be continued ...........

Quick catch up

0 comments
Just a quick catch up with some stitching from the end of last year.

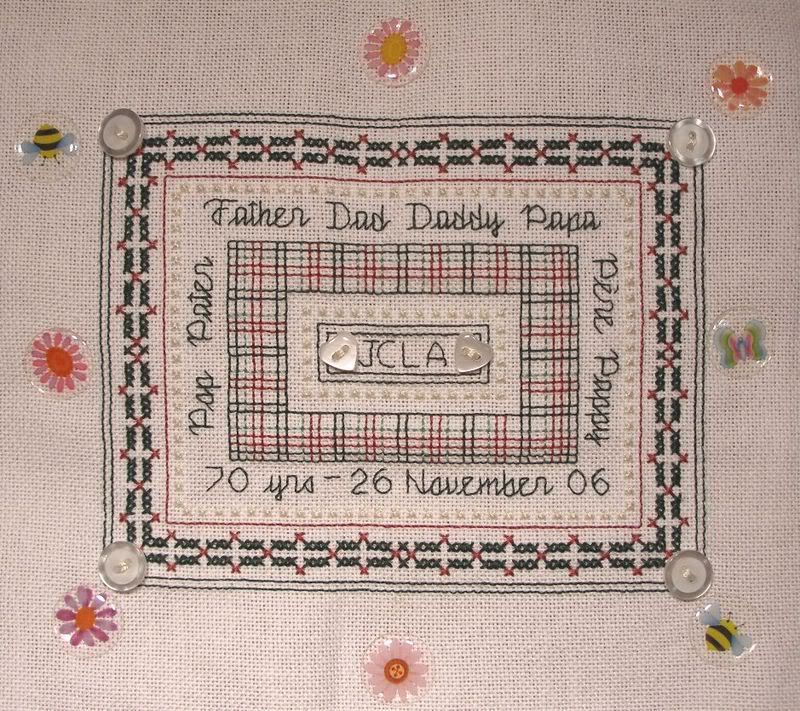
First my dad's birthday/Christmas present -

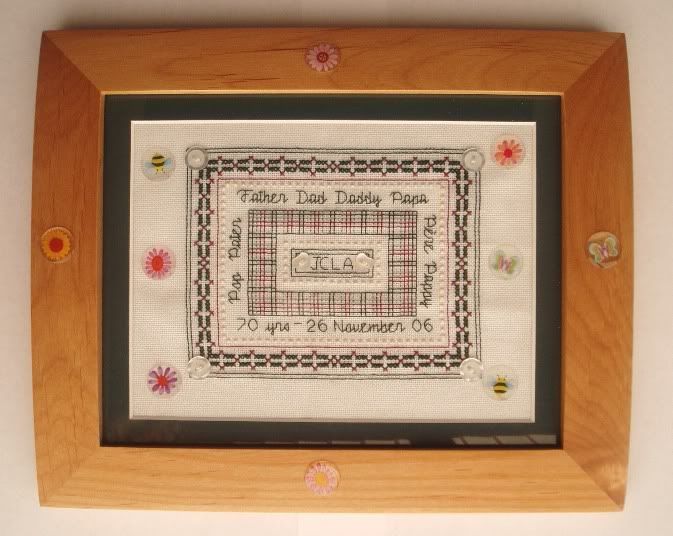
And the framed version -

It's my customised version of 'For Father' by JBW Designs. I am really pleased with this one as I framed it myself. The frame too I really like, although it was all bought and done on the cheap!

I did another customised version of 'For Father' for my brother, but changed the colours (using blues) and the wording. I don't unfortunately, have a photo of that one.

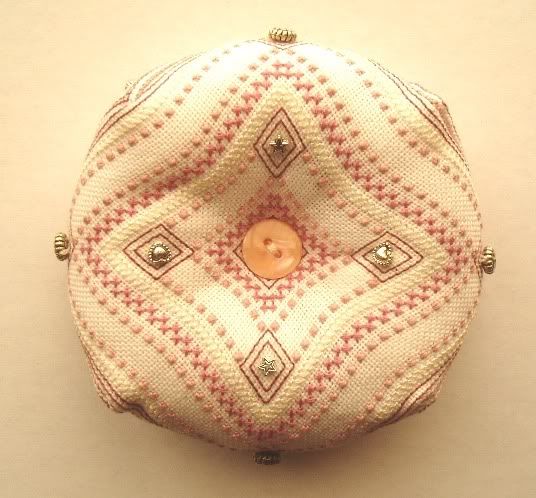
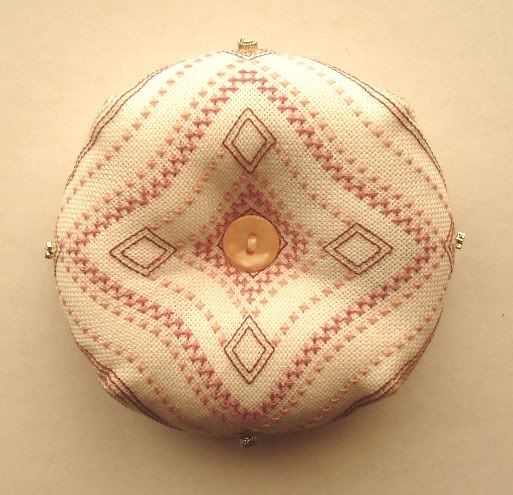
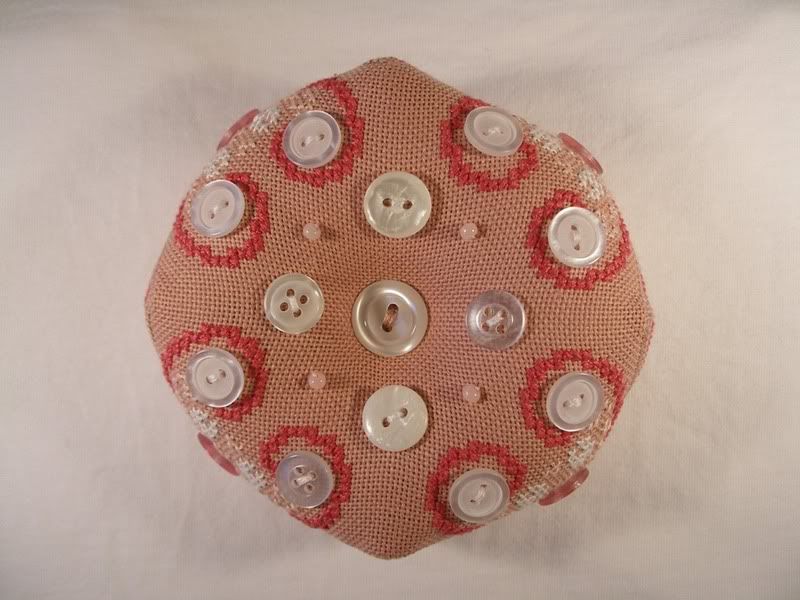
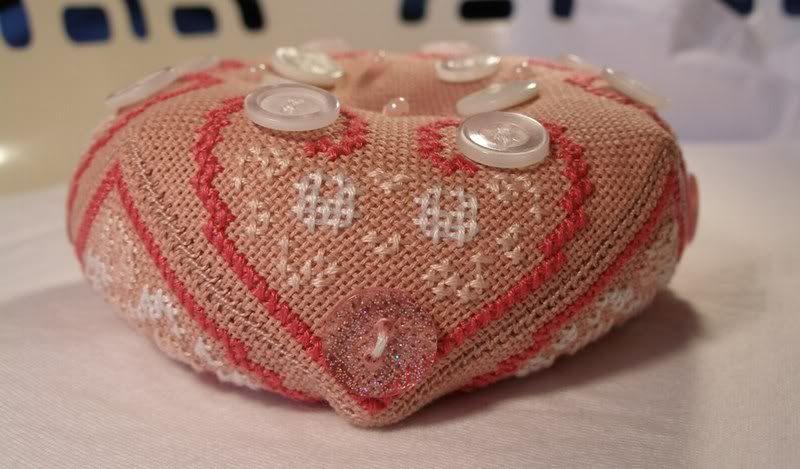
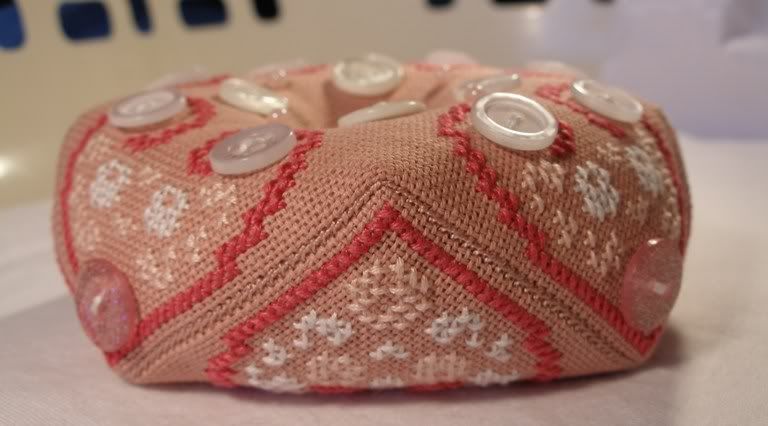
I also stitched for my mother's Christmas present, again a customised JBW design. This time it's 'Grandfathers: Love and Cherish'. I left off the words and changed the colours to 3 shades of pink. I stitched it twice, added some beads, and then finished it as a biscornu.

Front -

Back -

More on this year's stitching later.

Monday, December 04, 2006

Bad Blogger

0 comments
I've been feeling rather stressed out over the last few weeks and blogging and reading all those happy cheerful beautifully stitched blogs has just been too depressing, so I've been a bag blogger! I hate all those stitchers who turn out an exquisitely finished piece every week, when I'm struggling to find the odd half hour to put in a couple of stitches!

Saying that, though, I have finished a number of things over the last month, myself!

Here's my biscornu from the SAL at the Jayne's Attic Forum -


The buttons weren't in the original design, they were just my way of customising it!

I also finished Carol Tinson's Filigree -


I have framed this one, but don't have the photos to hand.

I also did this for my son's 6th birthday -


November is a popular time in my family for birthday with my Dad and son having theirs on the same day. It was also my gran's birthday in November, my future brother-in-law's and my ex-sister-in-law's!

We had a lovely party at home on Saturday for my Dad as it was his 70th. I also stitched something for him, but was a bit late in finishing, so didn't get round to taking a photo before I gave it to him!