Wednesday, January 25, 2012
Needles and Thread, not Yarn and Hooks
My inspiration over the new Chatelaine designs lasted longer than the time it takes to get home, play with the girls, feed them and get them to bed! Yippee!!
I actually went and got out Medieval Town Mandala, set it up on q-snaps, and got stitching!
Gosh – I’m so d@mn pleased with myself! I’m loving every second!
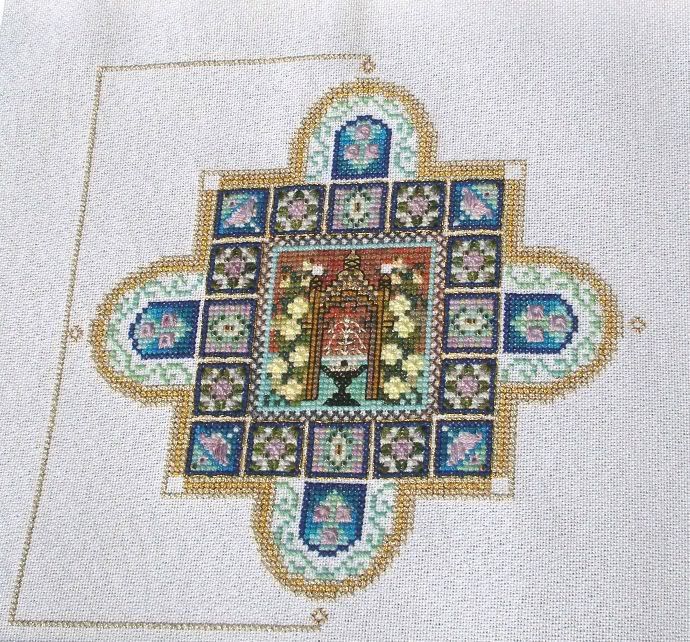
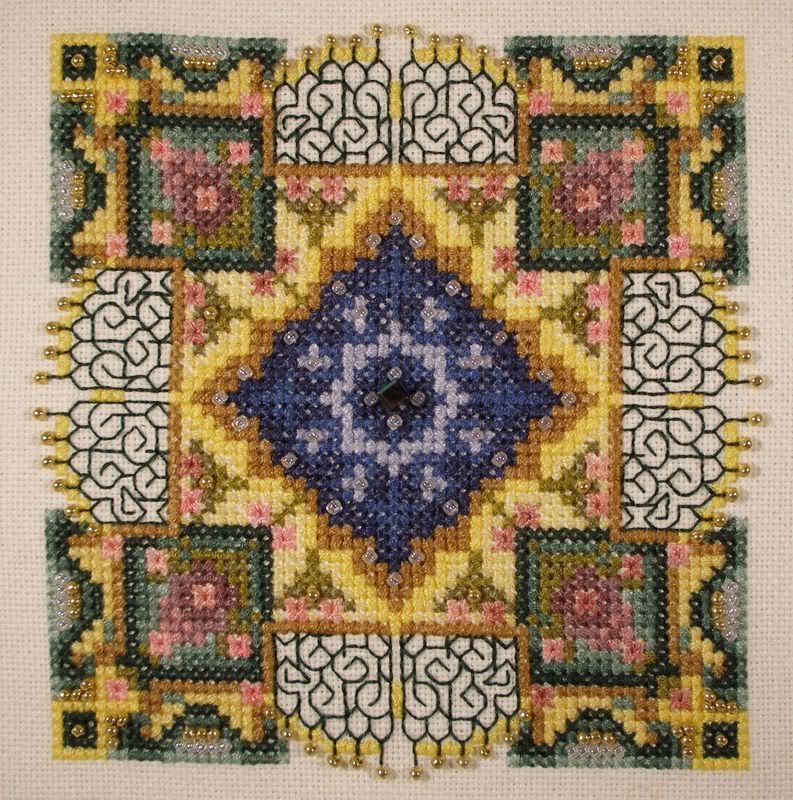
Here’s roughly where I’d got to the last time I shared a pic –
I’d finished part 5 (of 12) and was making a start on part 6.
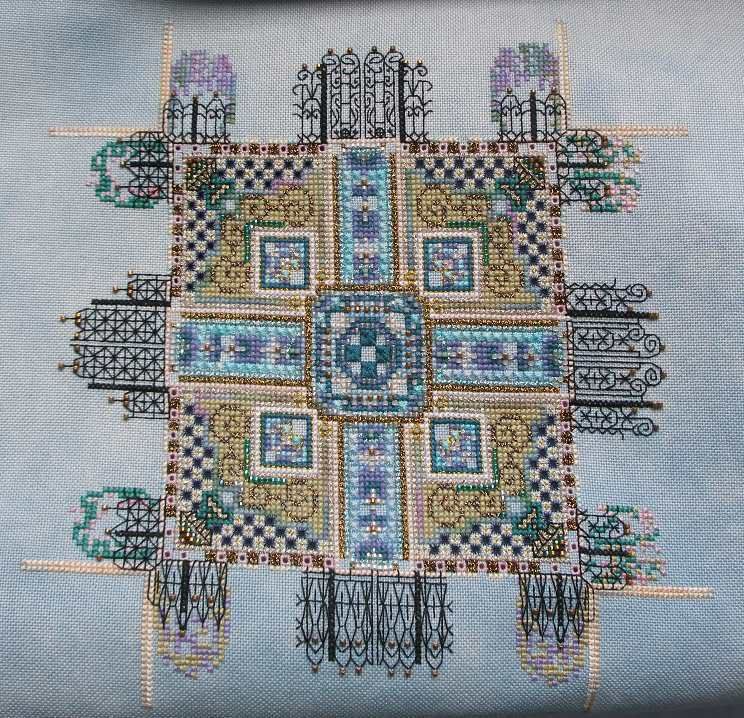
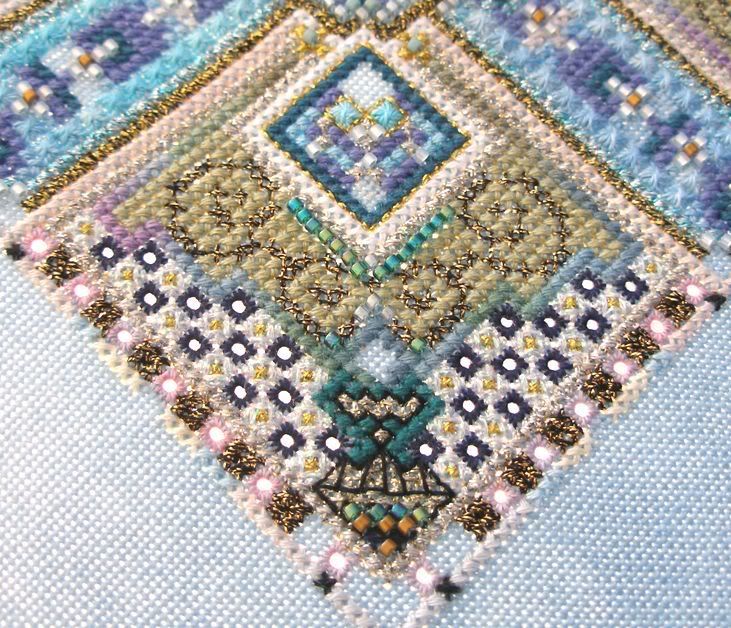
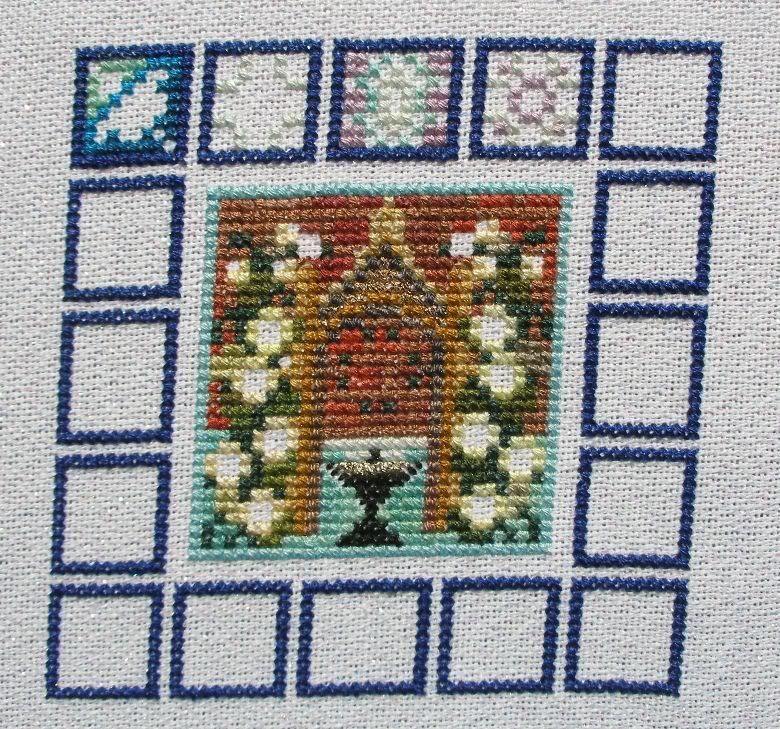
And here’s where I am now. Still part 6, obviously, but a little further on, I'm working on the big building in the centre of the north side of the square.
I’ve gone back to working on Gay Ann Rogers idea of 12 stitches per day, or as I do it, at least 12 stitches a day or as many stitches as I can fit in to the time slot I’ve allowed for it. So, what I’ve showed there represents almost a whole week of stitching.
It doesn’t make for fast progress, but it’s wonderful just to be doing it again!
Tuesday, January 17, 2012
D@mned inspiration!
I want to stitch these - NOW!
- Martina Rosenberg's Spring Watergarden
- Martina Rosenberg's Springy Micro Medallions
- Martina Rosenberg's 15th anniversary design - Sleeping Beauty's castle
Can you see me drooling?
Anyone want to give me some time and money as an early birthday present?
Hmmm ... might dig out MTM when I get home ... until I get distracted by something else!
Wednesday, July 28, 2010
Happy Dancing

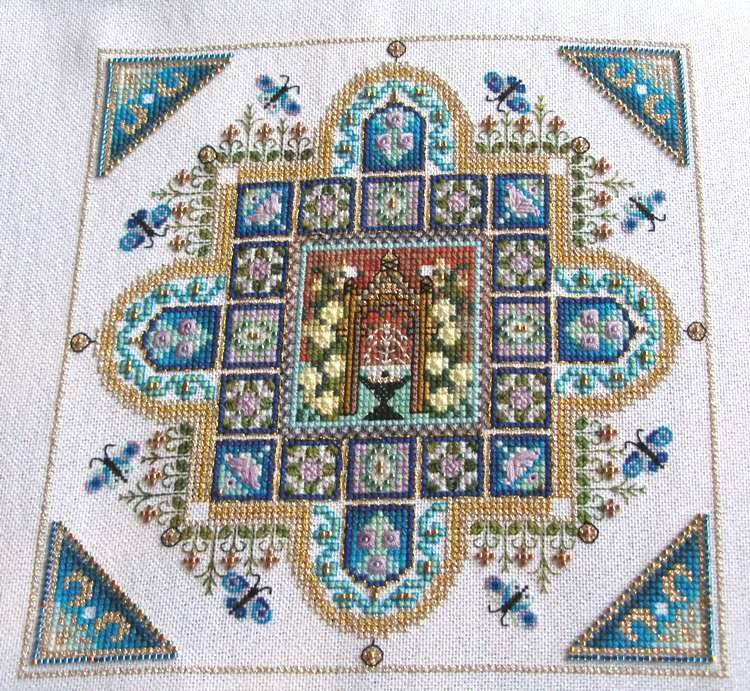
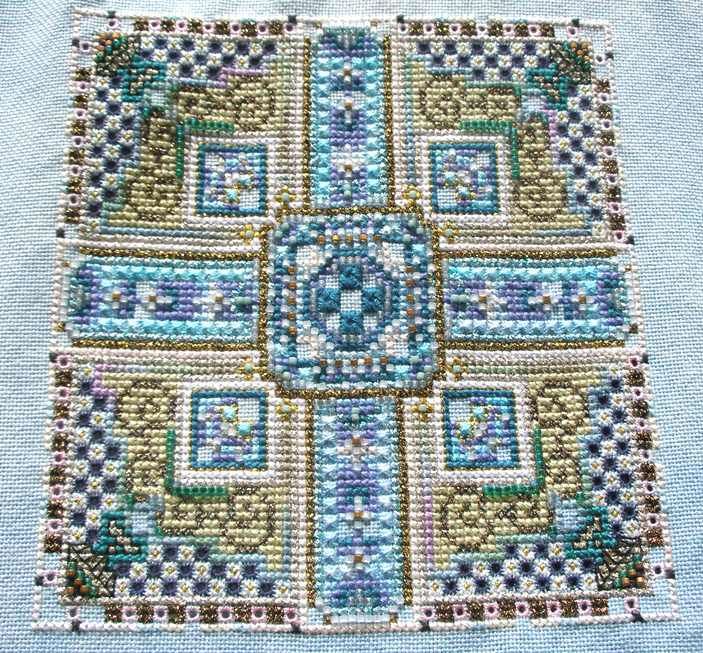
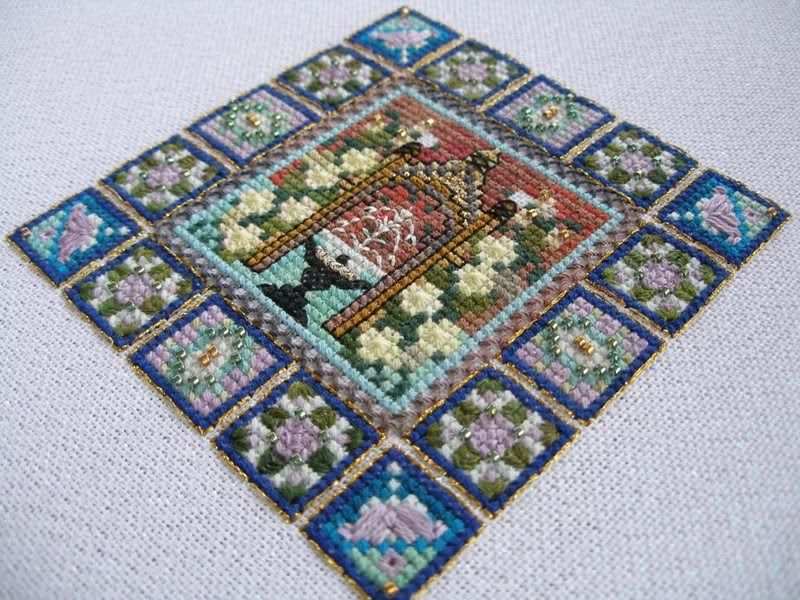
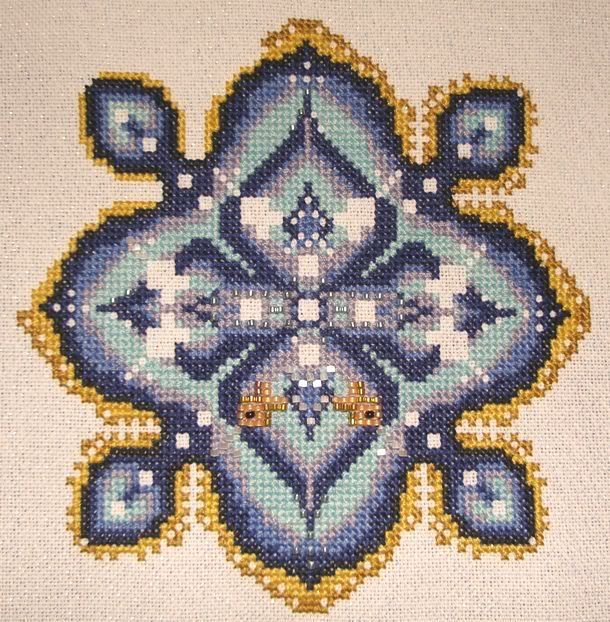
It's only taken me 2 years to stitch these 4 turquoise and gold corners. As there are still another 7 parts to go, it looks like it could be another 14 years before I finally finish this one!
Anyway, I'll keep going with it for now. I don't have a lot of time at the moment to dig through my stash and plan anything new to stitch, so it's quite useful just to plod on with this and I'm quite enjoying it. There is lots of planning going on in my head - I just hope I don't forget it all before I can do something about it!
So MTM is the main focus of my stitching, but there are bits and pieces of crochet going on too. I put this together last week, having seen similar on Flickr.

And someone I know was very pleased with her new pink sunglasses last week!
Tuesday, January 22, 2008
Stitchy update no. 1 - MTM
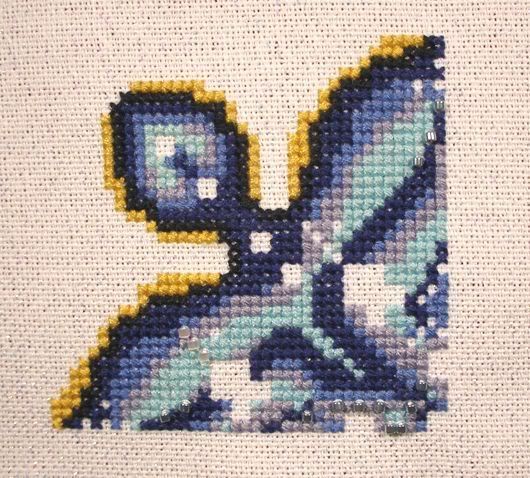
This one I'm particularly pleased with - I've finished part 3 of Chatelaine's Medieval Town Mandala!

Isn't it gorgeous? I love all the beads and sparkle, and the turquoise colours are just beautiful. I'm looking forward to more turquoise in part 5! The over 1 butterflies were a nuisance to stitch, but well worth it. Did you know that it takes longer to frog one of them than it does to stitch it in the first place? LOL I managed to get one of them a stitch too close to the grasses so didn't have space for the bead flower underneath. That was one mistake I couldn't ignore.
I'd love to keep going with MTM for now but have switched to Paradigm Lost this week as I'd like to keep adding to it fairly regularly. I'll also be getting Lizzy's RR to stitch on before too long.
But MTM is still calling to me - can't be a bad thing!
Friday, November 09, 2007
My first PIF!
I will send a stitchy gift to 3 lovely people who sign up for my PIF by leaving a comment on this post. In return, you should also offer a PIF yourself.
I'm really looking forward to doing this. I don't think I'll be sending out any PIFs before Christmas, but I'll start planning and try to get them done before baby comes along in April!
In other stitchy news, I picked up MTM again a couple of weeks ago and am now nearly finished part 2. I'm very pleased and I've really enjoyed stitching on it. Here's how things stood last Sunday morning - I've finished the outer gold box now, so only the backstitching and beads to go!

My chart for Paradigm Lost has now arrived for the Snowbird's SAL. And I finally ordered my fabric and floss for it. I can't believe how long it took me to decide what floss to use! First, I found a lovely varigated green Anchor thread that I thought would be perfect, but then discovered that it looks like this is an old colour as I can't get enough of the floss for the design! So I had to start looking again.
I've finally settled on a DMC varigated floss in shades of light blue, lilac and grey, fading to white. And I'm stitching on Antique White jobelan. I'm really looking forward to getting started and seeing how the design looks in these colours. All other versions of this design I've seen use darker, stronger colours and I'm really excited to see how it looks in the paler, more delicate colours.
Thanks to everyone who commented on my finished Starflake - I'm glad you all like it as much as I do! And thanks to Anita for pointing out that I neglected to name the designer. For anyone else who's interested, Starflake is designed by Patricia Ann Designs. The grey and pink colour scheme is an alternative colour scheme included with the chart although it is illustrated in the blue/white colours. I just thought the blue/white combination looked too cold.
Now a huge thank you to everyone who congratulated me on my pregnancy! I feel great now that I've told everybody amd am managing to stop going around all the time desperately trying to hold my stomach in! LOL I've been browsing around the web looking into Natal Hypnotherapy which looks interesting. I've also found a lot of info on VBAC which threw me a bit as I'd never considered that there might be an issue with my having had a caesarean last time. And why does everything I read assume that having a caesarean is a bad experience? When I look at my beautiful, healthy, happy son, how could it possibly be anything other than positive?
Wednesday, May 30, 2007
Silk threads and St Pete
I really loved stitching this part, despite the frogs, it's such a contrast from the dense stitching of the first two parts. And I love the backstitched gates.I find it interesting while I'm stitching to compare the silks and the DMCs and the varigated/solid colours. On only one of the four sides in part 3 have I used varigated colours in stitching the vegetation. And it happens that on that side I particularly like the way the vegetation looks with just that little bit more variation in colour.
The is probably the first design where I've used varigated threads to any significant extent and up to now, I was slightly sceptical of their value. Now I'm starting to change my mind a bit. I like those variagted threads where there is significant colour change across the length of the thread. I still can't entirely get the point of threads where the colour variation is so subtle, you can hardly see the difference.
I've also been thinking about silk threads - what is the point in using silk thread? What does it add to your stitching? I'm still a long way from being a convert on this one and at this point, I really prefer DMCs. I know the sheen of silk is supposed to be more than cotton. But, after a piece is finished and framed, I'm not convinced that anybody will be able to tell the difference. I'm fairly certain that, even when I've stitched a piece using silks and cottons, I won't be able to see any difference. I know that some stitchers prefer the feel of silk for stitching, and I know that for designers, using silks can create a much greater palette of colours. But I'm not convinced of the value in this.
Sometimes too, it seems to me like there's a kind of snobbery in stitching - silk is "better" than cotton and linen is "better" than evenweave as evenweave is "better" than aida. I'm not convinced I like linen - give me evenweave any day!
Anyway, the important thing is for all stitchers to enjoy their stitching, whatever the materials they're using. And don't be afraid to mix and match or substitute fabric and fibres to meet your preference.
Anyway, having finished St Pete, I didn't particularly want to pick up anything big, so I've gone back to my Starflake from Patricia Ann Designs. I started this around my birthday in February but didn't get any further than the beginnings of the central motif. I've made good progress since Sunday, but it's slow work. I'd hoped I would get it finished by the end of this week, but it looks like that isn't going to happen. It's all eyelets and smyrna crosses which, although I love them, stitch up soooo slowly! And then I came downstairs this morning and on a quick look, noticed that a group of eyelets I stitched last night aren't centred within the motif! Aarghhh! And then there's that other group of lumpy eyelets from yesterday and I'm also tempted to frog .......
Monday, April 30, 2007
Stitching to a deadline
The deadline was entirely self inflicted as I didn’t get started on part 2 until after I came back from Scotland on the 13th. And yes, I know that it’s not compulsory for me to stitch each part of St Pete within the month when it is released, it’s just me! If I can do it, I HAVE to, and I’ll push myself to do it, getting completely stressed out along the way.

However, from a designer’s point of view, 'deadlines' like this must be very useful. With a large project like St Petersburg, releasing the chart bit by bit ensures interest is retained throughout the length of the project. I suspect the 'drip-feed' approach in this way means more money for the designer.
I’m sure a lot of stitchers would be completely overwhelmed if handed a chart like this all in one go. The 'drip-feed' is therefore also beneficial to the stitcher.
And on the plus side for both stitcher and designer, one design successfully completed this way is likely to encourage the stitcher to come back for more, and to encourage more stitchers in to this way of working.
However, from my point of view, deadlines are all very well, as long as I have plenty of time to keep up with them. I’d never make it as a model stitcher!
Thursday, April 12, 2007
On Tintock Tap …….
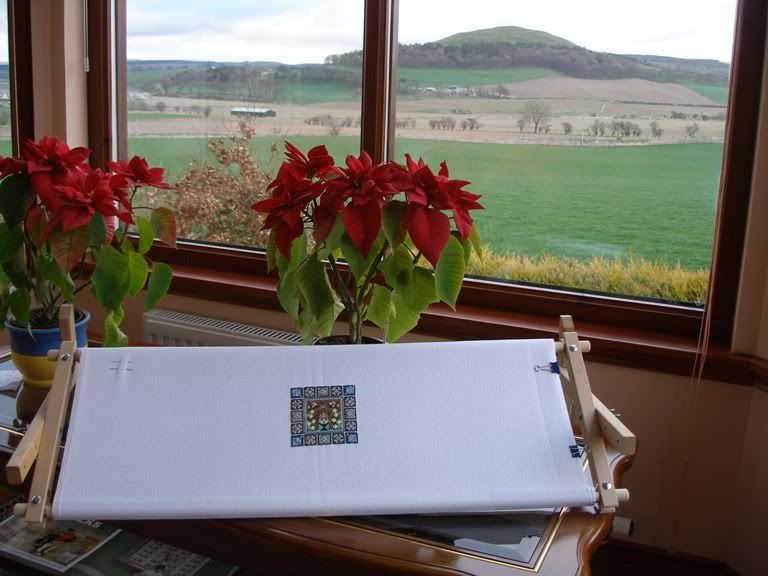
This is the view I have to look out on while doing my stitching –

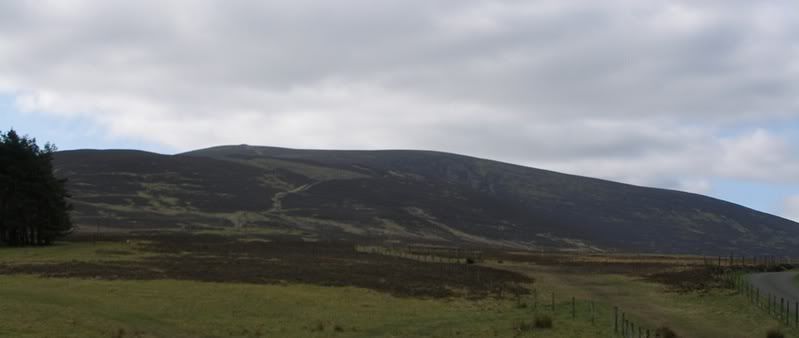
The hill is Quothquan Law. Behind me and beyond a row of houses and some fields is Tinto.

The stitching you may have noticed is Medieval Town Mandala. Despite having part 2 of St Petersburg to work on, I didn’t particularly want to dismantle and transport my huge scroll frame, so MTM it is this week. I’ve now completed part 1, despite a little confusion over the backstitching (despite looking at both colour and black and white charts, I still wasn’t completely certain how it worked). The fountain also took me 3 goes.
Anyway, I’m now making excellent progress on part 2, after checking other stitchers’ work on the Internet to be sure it really does come so close to part 1. I’m not entirely certain of the benefit of the gold backstitching round the blue flower beds in part 1 when the gold border, although a different shade of gold, lies so close in part 2.

Finally, the doting mum takes over as we climbed Tinto this morning. It’s the first time my 6 year old son has done anything like this and I’m very proud of him!

It’s the cairn on top of Tinto that the Tintock Tap rhyme refers to.
Tuesday, April 03, 2007
March roundup
Watergarden - I haven't stitched this since the beginning of March and am going temporarily retire it from my WIP list as others will be taking priority.
One of the things with all Chatelaines is the amount of beading involved. I didn't fancy the idea of leaving it all to the end, so decided that I'd add the Delicas in stages. At the end of February, I reached a point where I'd finished the central blue section and started the surrounding border, so I decided it was time to do a little beading.

Part 1 of St Petersburg became available at the beginning of March and I was really pleased to complete the stitching and add the Delicas on schedule, even with a week left over at the end of the month! My monster scroll frame made an enormous difference.

Part 2 was released last weekend, so I'm hoping to get started this evening!
In the last week of March, I picked up Medieval Town Mandala again. Actually, I completely restarted it having decided that I really wanted to do it on opalescent fabric. The amount I'd completed previously was minimal, so it wasn't a problem. I'm really pleased with the progress I've made to the extent that I've almost finished part 1 and the photo below is becoming out of date!

I'm also very pleased with the progress I've made on Nova over the last month. In October, I'd completed the first 3 blocks. In March, I added another 7!

On the down side, I haven't been able to keep up with Carol Tinson's Huswif as I would have wished. Part 3 is due this month, and I've only just finished part 1. This one has been my lunch time stitching at work where I've been feeling a bit stressed and not much like stitching recently. Sometimes even, it feels like the stitching adds to the stress. It gets confusing when I actually enjoy doing it yet feel stressed by it at the same time. So I think I may take a break from the lunchtime slot for now. Maybe when the weather is better, I'll get out to the park at lunch time and do a little stitching there. Sorry I don't have an updated picture!
Wednesday, March 28, 2007
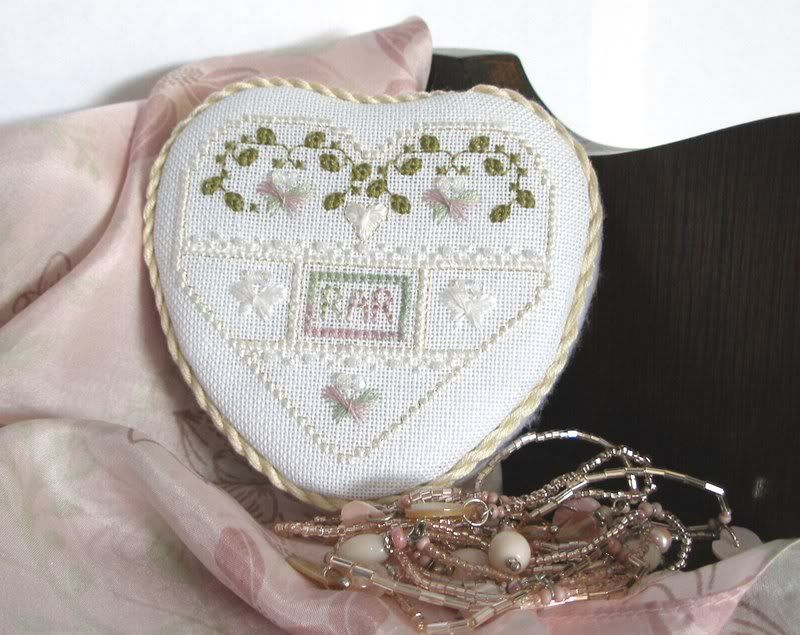
Tin finish

It looks very pretty and I'm really pleased with the way it turned out as it's the first piece I've finished as a tin top. My friend really liked it too.
I got the design as a kit with everything I needed, including the tin. The first step was to stitch the top as normal. At this point I discovered some really horrible silky thread in the kit that was absolutely awful to stitch with. I'm not even completely certain what it was - in one place it's referred to as White Silk Mori and elsewhere as Creme Silk from Needle Necessities.
Whatever it was, it was really horrible to stitch with - the strands kept separating and slipping out of my needle and turning into a yucky fluffy tangle! However, as I'm fairly new to stitching with silk, I've no other white silk in my stash. I therefore persevered as I wanted to retain the effect of the sheen of the silk.
I also found that the chart could potentially be misleading as one of the symbols used for the beads, a dot, was also used to indicate the position of the Rhodes butterflies on the chart.
However, despite these drawbacks, I think it was certainly worth the effort.

Finishing the tin was fairly simple, if a bit fiddly.
You mark the shape of the tin on to a piece of card and cut it out. The stitched piece is then attached to the card and then this stuck to the tin. However, between the card and the stitching you need some padding - I used a couple of layers of white felt. The stitching is then attached to the padded card with a mixture of glue and lacing to get a nice firm fit and ensure none of the edges of the fabric show round the edges of the card.
Finally, you can run a length of fine cord around the top of the tin to hide the area where the tin and the stitched top meet - it makes a much neater finish.
You can also cover other parts of the tin. As the tin was red, I covered those parts of the tin top that would still be visible after the stitched top was added with a layer of white felt. A finer, better quality fabric or ribbon would give a finer, more professional finish, but I was quite happy with the felt. Another time, I'll try something different.

Thanks to everyone who commented on my monster scroll frame! It really has made an enormous difference to my stitching and have finished part 1 of St Petersburg (photos to come soon).
Trish asked about the tension of the fabric on the rods - I confess that is an area needing fine tuning! The tension of the fabric is not consistent across the width of the frame. However, so far, it hasn't annoyed me sufficiently that I've done anything about it. I suspect that the curtain tape hasn't been attached to the rods in a straight enough line. Either I'll have to loosen off everything and re-attach the tape, or I might try rolling an extra piece of fabric round the rods beside my stitching fabric to tighten things up at bit.
Anyway, flushed with enthusiasm over this success and the luxury of being able to use both hands properly while stitching (no man-handling a scroll frame now it's on a stand), over last weekend, I drilled 5mm holes in the side bars of my 30 inch scroll frame (on which I have Medieval Town Mandala) so that I could attach the same stand/legs to this frame too. I'm not sure that I'm very good at drilling holes in a straight line, but the end result works a treat and I'm making excellent progress on MTM while waiting for part 2 of St. Pete.

| Your Element Is Air |
![]() You dislike conflict, and you've been able to rise above the angst of the world. And when things don't go your way, you know they'll blow over quickly. Easygoing, you tend to find joy from the simple things in life. You roll with the punches, and as a result, your life is light and cheerful. You find it easy to adapt to most situations, and you're an open person. With you, what you see is what you get... and people love that! |
Monday, February 26, 2007
Kitting a Chatelaine
Many Chatelaine designs use a variety of silk threads, both solid colours and varigated. As they're silk, this significantly adds to the cost of the project. Fortunately, Martina Weber also publishes a DMC conversion for these projects so that stitchers can choose how much they wish to spend or swap out those threads they dislike. The question of buying beads also needs to be considered as Martina normally uses Delica beads, but also produces a conversion to Mill Hill.
I've now got 2 Chatelaine projects started and will be adding a third fairly soon. Each of them has been kitted in a different way.
Project number 1 - Watergarden
Watergarden uses quite a lot of DMC threads, as well as silks, so is easier than for many other designs to get hold of all the materials. However, for this design, I chose the oprion of making a simple purchase from European Cross Stitch for all the silk threads and Delica beads. This really was the simple, easy option.

Project number 2 - Medieval Town Mandala
I started this project on my birthday but have made little progress to date as I discovered I have a couple of threads missing. Other than that, I have all the silk threads for this project, no DMCs at all. In this case, the silks were all collected as Christmas and birthday presents from my family. I emailed them a list of the threads needed and suggested a couple of online shops to buy from. From my point of view, this worked our fine, but I have now discovered a couple of threads missing and I haven't been able to find an online source in the UK. I've now emailed European Cross Stitch who have the necessary threads and will be able to send me them.
For the beads, I bought several of the colours required on ebay, but have one colour I don't have yet. I know of one or two online shops that stock this bead colour, but it seems a bit ridiculous to pay more in postage that the actual price of the beads!
I haven't made much progress stitching this one as I discovered early on that I needed to use the threads I'm missing. I could keep going, but would prefer not to as I don't want to risk mistakes.
Project number 3 - St Petersburg White Nights
This will be a 12 month project with the chart issued in monthly installments. The materials list and DMC conversion were issued in early February and the first chart will be issued on 1st March.
For this project, I've decided to go with the DMC conversion rather than use the majority of the silks. That part at least is straightforward! The problem really is to decide which of the varigated silks to keep and which to swap for DMCs. There are some online shops and thread producers who show sufficiently detailed photos of the thread to see just how much varigation there is. Even then, it's still not as good as having the actual threads in your hand. However, I have made my choice on this basis, and I'll see how it goes.
For the beads, I've given in and simply ordered the bead pack from European Cross Stitch.
Although I've mentioned European Cross Stitch several times already, I haven't mentioned the different options they offer for kitting a Chatelaine. For St Petersburg, they offer full kits with all fabric, threads and beads. You can get a kit without the fabric, without the solid colour silks, or just the bead pack. On other designs, you can order only the silk threads. I see that Needlecraft Corner too offers a similar service for some Chatelaine designs, althout I've never bought from them at all.
I'm rapidly coming to the conclusion that, for me, European Cross Stitch is the answer. In future, I may just opt for a full kit minus solid coloured silks and fabric - the other ways are too much hassle!
Thursday, February 08, 2007
Enlarging PDF charts
Additionally, if you join one of the Chatelaine groups on Yahoo, such as Chatelaine Design Support, then instructions can also be downloaded from there. If you still have problems, then both at ezboard and on Yahoo, you'll find a bunch of friendly stitchers more than happy to help.
I believe that the way in which Martina supplies her designs as pdf documents that you can enlarge so readily is very good. Many of the paper based charts you can buy are so small that, although still readable, they can make it harder for you to follow the chart. The advantage of these pdf based charts is that it is entirely up to you how large you print the chart. Of course, the disadvantage is the number of pages you end up printing the chart out on.
However, the biggest disadvantage of these pdf based charts is that it can be incredibly fiddly and time consuming working out exactly how you do want to print the chart and how large you want the symbols to be. You're also printing each page of the pdf document on to multiple sheets of paper and need to make sure you keep track of how all these pages fit together - no small task! This makes printing charts very complicated and heavy going for those who aren't so familiar with the workings of a pc.
But - don't be discouraged - it really is worth it! If you do have problems printing out your chart - come on to ezboard or the Yahoo group and just ask!
I've printed out my chart slightly larger than I would normally use a chart and , for the first time, I'm using a marker pen to mark off stitches as I do them - the larger chart gives me more space to do this without making a mess of the rest of the chart. So far it's working well.

![]()
To be continued ...........
Edited at 5.20pm
It's just been posted on ezboard that one contributer has just written some new instructions for enlarging charts with Adobe Reader 8 - see here for the instructions - and thanks to the person who wrote them!
Tuesday, February 06, 2007
Chatelaine for beginners

It really is a lovely design, with beautiful shades of blue. It will be my first large Chatelaine design, although I have completed one of her freebies, Tiny Rose Garden. Watergarden is considerably larger than the freebie, at 237 x 237 stitches, working out at 14.8 x 14.8inches stitched over two on 32 count fabric.

I bought my chart directly from Martina Weber, the designer, via her website, Chatelaine Designs. This is an instant access chart where, after payment, you are sent a hyperlink to the area of the website to download the chart. A password is also provided. At the time when I purchased my chart, Martina was having problems with her ISP and was in the process of moving to a new server. She warned me initially of the problems she was having and when the link she sent me didn’t work, I contacted her. She couldn’t have been more helpful in ensuring I got my chart, even sending a copy by email and following up with a new download location.
The file I received was a zip file containing 5 pdf documents and a jpg image. To view the pdfs, Adobe Reader is normally required. The jpg image can be viewed a number of ways, through image viewers, web browsers or even by pasting into a word processed document. The files are:
- General instructions
- Materials list
- Black and white chart
- Colour chart
- Introductory note
- Image of the design
The general instructions include any detailed instructions for specialist stitches to use and for beading.
Unlike many Chatelaine designs, Watergarden uses many DMC threads as well as silk thread from Needlepoint Inc, Caron Collection, Thread Gatherer and Rainbow Gallery Petite Treasure Braid. The design also requires 11 colours of Delica beads, and two shades of Swarovski crystals.
Materials lists for all Chatelaine designs can be viewed at the Chatelaine Supply Lists website. The American distributor for Chatelaine Designs, European Crosstitch Company, also supplies kits for those designs available.
It is possible to use DMC threads for this design rather than the Needlepoint Inc silks as the conversion is given with the materials list. In my case, however, I've chosen to follow Martina's recommendation and use the NPIs as I've never used them before. My fabric is Zweigart 32 count Murano - Lurex fabric in pearl flecked white (bought from Sew and So). I bought the beads and silks threads from European Crosstitch Company.
![]()
To be continued ...........