Wednesday, May 30, 2007

Silk threads and St Pete

6 comments
So the frogs have been banished and I've finished part 3 of St Petersburg!
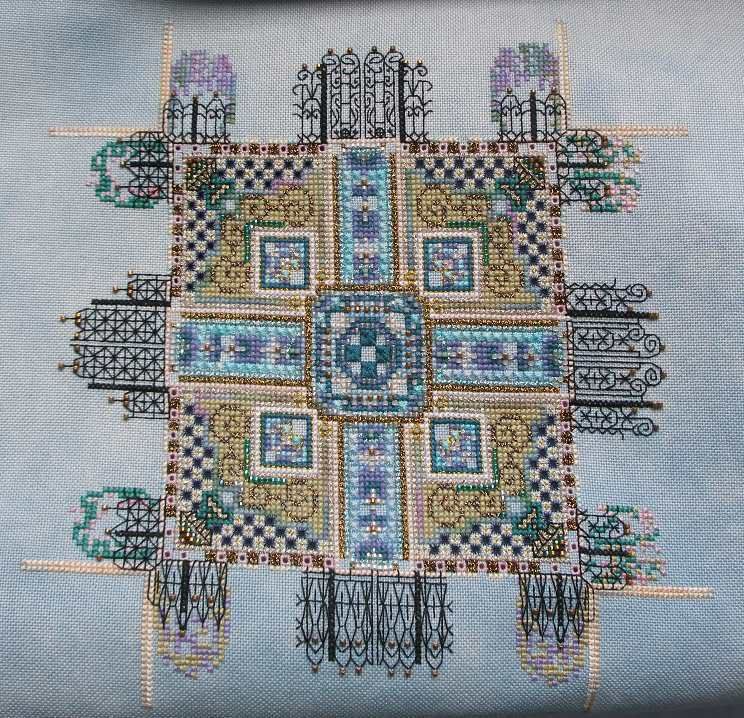
I really loved stitching this part, despite the frogs, it's such a contrast from the dense stitching of the first two parts. And I love the backstitched gates.

I find it interesting while I'm stitching to compare the silks and the DMCs and the varigated/solid colours. On only one of the four sides in part 3 have I used varigated colours in stitching the vegetation. And it happens that on that side I particularly like the way the vegetation looks with just that little bit more variation in colour.

The is probably the first design where I've used varigated threads to any significant extent and up to now, I was slightly sceptical of their value. Now I'm starting to change my mind a bit. I like those variagted threads where there is significant colour change across the length of the thread. I still can't entirely get the point of threads where the colour variation is so subtle, you can hardly see the difference.

I've also been thinking about silk threads - what is the point in using silk thread? What does it add to your stitching? I'm still a long way from being a convert on this one and at this point, I really prefer DMCs. I know the sheen of silk is supposed to be more than cotton. But, after a piece is finished and framed, I'm not convinced that anybody will be able to tell the difference. I'm fairly certain that, even when I've stitched a piece using silks and cottons, I won't be able to see any difference. I know that some stitchers prefer the feel of silk for stitching, and I know that for designers, using silks can create a much greater palette of colours. But I'm not convinced of the value in this.

Sometimes too, it seems to me like there's a kind of snobbery in stitching - silk is "better" than cotton and linen is "better" than evenweave as evenweave is "better" than aida. I'm not convinced I like linen - give me evenweave any day!

Anyway, the important thing is for all stitchers to enjoy their stitching, whatever the materials they're using. And don't be afraid to mix and match or substitute fabric and fibres to meet your preference.


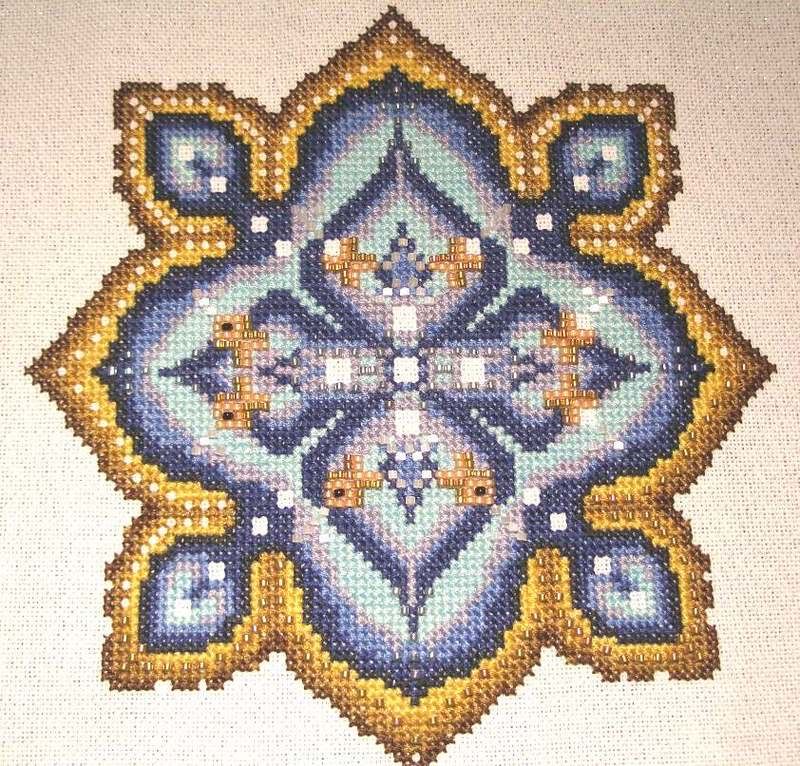
Anyway, having finished St Pete, I didn't particularly want to pick up anything big, so I've gone back to my Starflake from Patricia Ann Designs. I started this around my birthday in February but didn't get any further than the beginnings of the central motif. I've made good progress since Sunday, but it's slow work. I'd hoped I would get it finished by the end of this week, but it looks like that isn't going to happen. It's all eyelets and smyrna crosses which, although I love them, stitch up soooo slowly! And then I came downstairs this morning and on a quick look, noticed that a group of eyelets I stitched last night aren't centred within the motif! Aarghhh! And then there's that other group of lumpy eyelets from yesterday and I'm also tempted to frog .......

Wednesday, May 23, 2007

A Gift

8 comments
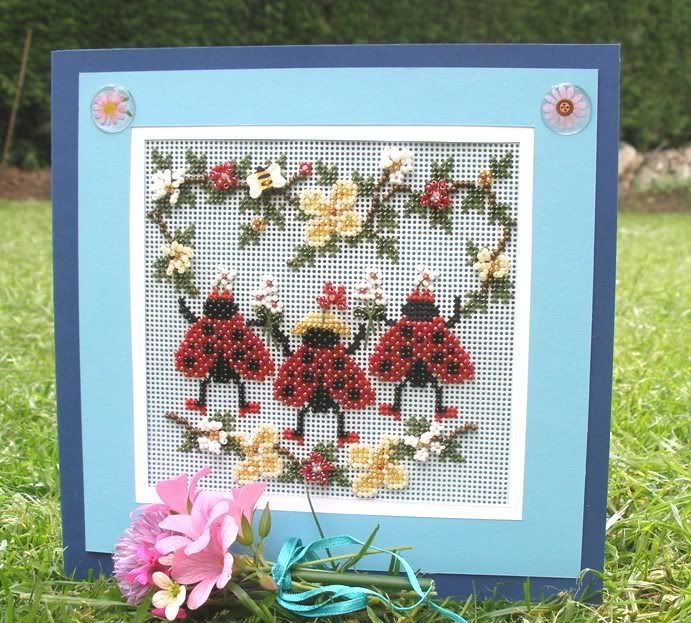
One of my son's teachers is leaving at the end of the week, and I thought I'd let you see what I made her as a leaving/end of year gift.


It's a Mill Hill Buttoned and Beaded kit called Ladybug Dance, stitched on perforated paper using DMC threads, Mill Hill beads and a bee button.

I hadn't done anything before using the beads in this way, neither had I tried stitching on perforated paper (more like perforated card), so I'd just wanted to have a go. My stitching experience was nothing special, it's really a simple design. The beads just add an extra dimension and more vivid colour (I really do like the colour of those red beads). However, once I'd finished my first two ladybirds, I started to get rather bored with it - slightly unfortunate, as I've another two similar designs to do for my son's other teachers!

I've just finished it into a card using 3 colours of cardboard and I'm very pleased with how it looks. Actually, I think it looks much nicer that I thought it would! I can't think how else to finish something on perforated paper - any suggestions?

Overall, though, I'd much rather work on my Chatelaines any day! Currently I'm having to frog a significant part of my St Petersburg part 3. I've no idea what I did - perhaps I accidentally rotated the chart or something, but I've muddled up some of the colours . At least I'm still on track to have this part completed before the next arrives.
Friday, May 18, 2007

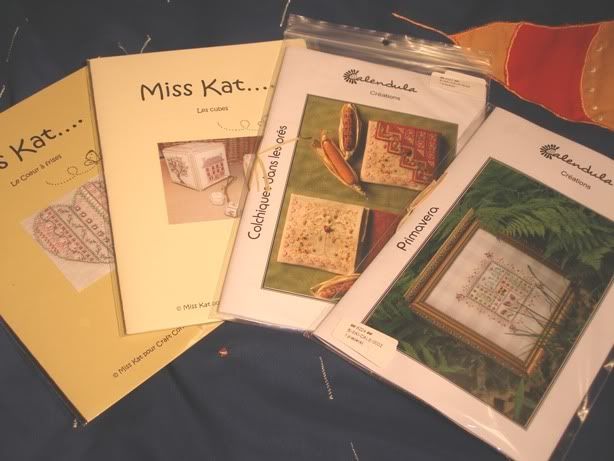
Fabulous French stash!

6 comments
French language at least - I think one of the designers is Canadian, the other may be Belgian!


I've been drooling over the Calendula charts for ages as well as a lot of the Craft Corner stuff.

My next task with this stash is to attempt a translation, armed with my O grade French, and Google/Babelfish to translate online. If I get really stuck, I can always ask my DH.

There are a lot of gorgeous French designs out there and a browse aroundsome of the French sites can really get me drooling! Some of the French/French language designers also produce some gorgeous freebies.

I currently have Maryse's Petite Maisons de Campagne kitted up and ready to go, I just have to find the time to start. And I'm a regular visitor to Bé Courtadet's blog where there's always something exciting going on.

Then there is Isabelle Vautier who is another designer whose work I really admire.

Many French bloggers also take part in SALs for these designs. See

Les Grilles de Maryse
Les folies d'Aurélie
Le Cirque

Or if I feel bored at work, I browse around one or two of the French ONS. Have a look at De Fil en Idees, Bricol'Art or Univers Broderie.

It can be a real eye-opener!


This week, I've also been tagged by Itching to Stitch to says 8 things about myself. Here’s how it goes:
1. Each player starts with 8 random facts/habits about themselves
2. People who are tagged write a blog post about their own 8 random things and post these rules
3. At the end of your blog you need to tag 8 people and post their names
4. Don’t forget to leave them a comment and tell them they’re tagged, and to read your blog.

Here are 8 random facts about me -

1. I have a B.Eng. in Chemical Engineering but have never worked as a Chemical Engineer.
2. Most of my career I've worked in higher education.
3. I've climbed 8 Munros (Scottish mountains over 3000 feet) and would like to complete all 280 odd.
4. My DS thinks he's English, despite being hald Scottish and half Algerian. At least at 6 years, there's plenty of time to indoctrinate him!
5. I taught myself to stitch.
6. There are no other stitchers in my family, and none of them takes the slightest interest in my stitching.
7. I used to colour my hair until the stuff made my head come out in horrible itchy spots and my hair fall out. Needless to say, I don't do it any more but my scalp has never recovered. At least, as it's allergy related, the hair grows back and nobody would ever know.
8. I don't like being away from home over night and really hate staying in hotels.

I've seen this on many blogs over the past couple of weeks, so most people have probably done it. If you haven't and would like to have a go, consider yourself well and truly tagged!

Tuesday, May 15, 2007

A sense of achievement

10 comments
WARNING - THIS POST HAS LOTS OF PHOTOS!

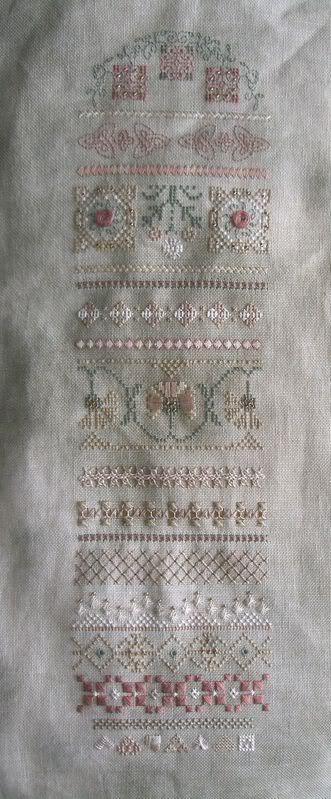
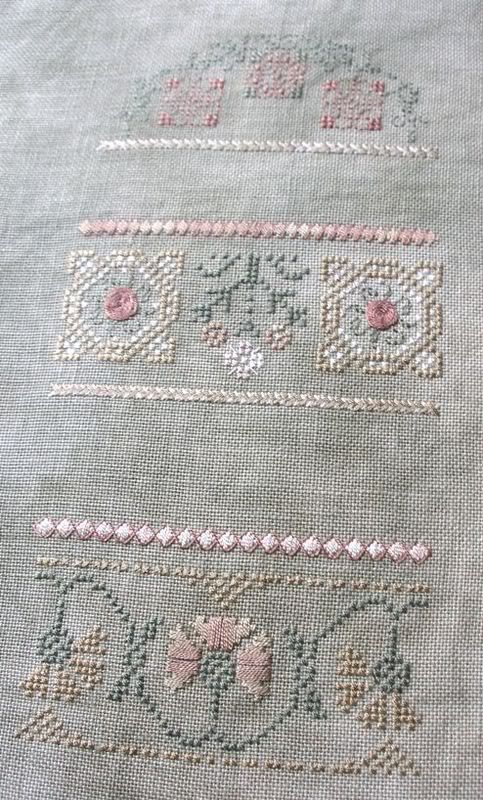
I feel quite a sense of achievement! I’ve finally caught up on all the stitching on my huswif. AND this includes the stitching on the alphabet bands which I omitted and had to invent something to fill. I’m really pleased with the end result.
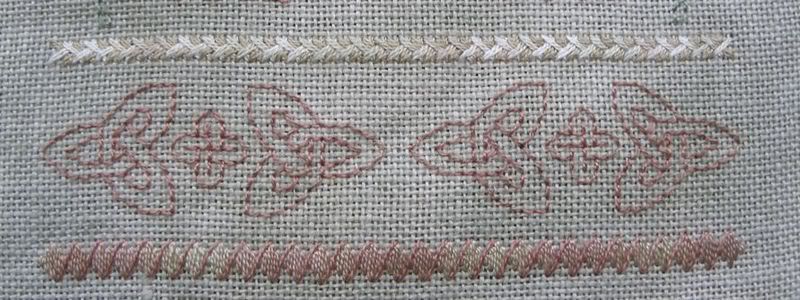
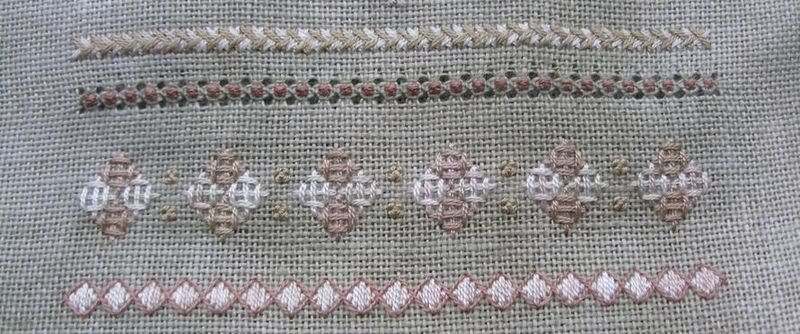
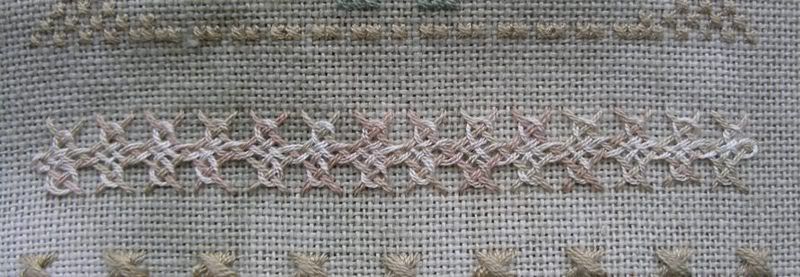
The bands I added came from a combination of browsing on the internet and flicking through a couple of books, the Proper Stitch by Darlene O'Steen and the Embroidery Stitch Bible by Betty Barnden. I just picked out a few stitches or designs/ideas I liked and had a go.

Band C - should have held the first part of the alphabet. I've stitched instead some Celtic knotwork, the design for which I found somethere on the web and adapted to fit this band. It's stitched with the Hazelnut thread.

Band G - second part of the alphabet. This is a Rice Stitch variation from the Proper Stitch which I've stitched in a combination of French Artichoke and Light French Artichoke. In between each diamond, there are a couple of smaller rice stitches in Burnished Gold.

Band J - This one I'm really pleased with - I love the Interlaced Herringbone! And I'm so chuffed that I finally got it right this time, thanks to Darlene O'Steen's instructions. The herringbone is stitched in French Artichoke with the interlacing in Light French Artichoke.

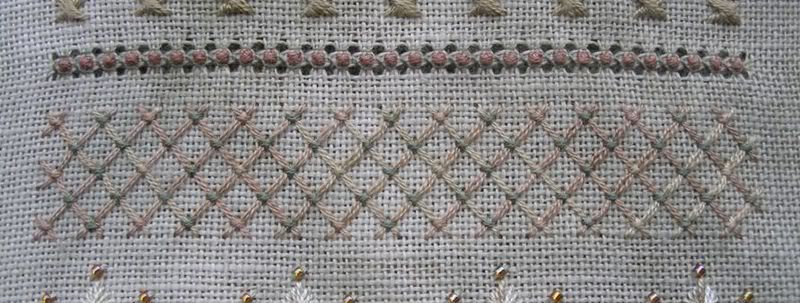
Band L - this is a lattice stitch stitched on a diagonal with the long stitches of the lattice in French Artichoke and tie-down crosses mainly in Verdigris with some also in French Artichoke.

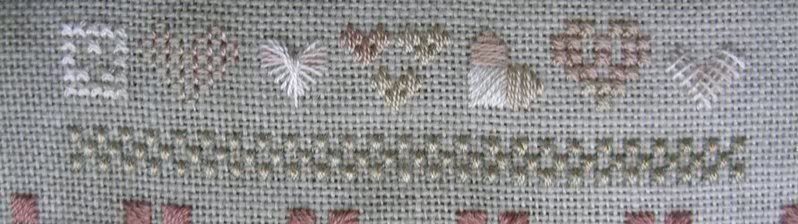
Band P - this one is a bit of a mixture as I changed my plans for this band at the last minute. There are three rows of Smyrna Crosses with the bottom 'normal' diagonal cross stitched in Verdigris and the upper upright crosses stitched in Burnished Gold. Below that is a row of hearts in French Artichoke and/or Light French Artichoke stitched using different techniques, the inspiration for which came from a Drawn Thread freebie, Heart Throb.

I may still add a few beads to my custom bands, but for now, the end result looks like this!


You may notice that I also changed the colours used in one or two places as I went through a phase of hating the colour of the Hazelnut thread.

I've heard that some stitchers have been running out of thread on this design. I've come fairly close to it myself, mainly with the Burnished Gold and the French Artichoke. I would have liked to use the Verdigris more. The only frustrating point is that I broke my gold needle!

Now I just have to add the fasteners for the huswif, and then I'm ready for the final part next month.

Tuesday, May 08, 2007

A sampler of sorts

4 comments
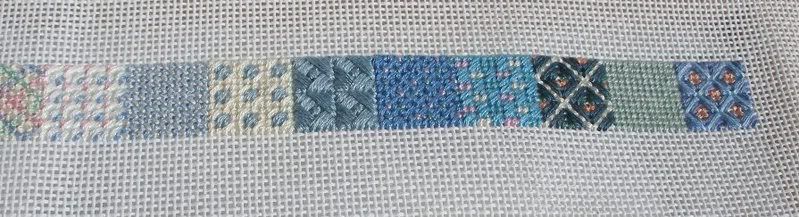
I love speciality stitches! They are often an important factor in what draws me to a design or designer’s work. I love the way they add texture to a piece, the way the light reveals different parts of the stitch or highlights the thread in different ways.

It's one of the things I really like about Carol Tinson's designs.


Rhodes diamonds in Carol's huswif.

The range of embroidery stitches to try is immense and to date, I’ve been rather limited in my experience. I’ve come across Sharon Boggon’s classes at Joggles, particularly her “Develop a Personal Library of Stitches” and I’ve drooled over the idea of taking her “Encrusted Crazy Quilting” class, but I’ve never got there, whether through lack of confidence, laziness, or lack of time. I also regularly read up on her “Take a Stitch Tuesday” challenge which gives a fantastic introduction to many stitches and how you can use them.

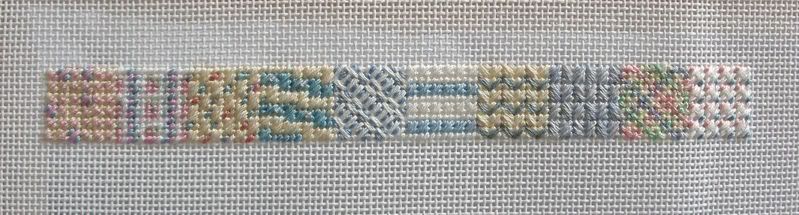
Last weekend I set out to explore some stitches with a piece of linen, some perle cotton, and a little stranded cotton.

This is the end result and I had a lot of fun! It is still a work in progress, and will probably continue to be so until I fill the entire fabric.

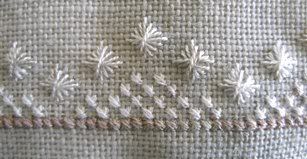
Some of the stitches I've come across before - the Rhodes diamond, spider's web rose (woven wheel), chain and blanket stitch. Many of them are also completely new to me - the interlaced herringbone, lattice, Queen stitch.

I know many of the stitches are a bit irregularly shaped or lopsided - the point of the exercise was to learn about how the stitches are constructed, not to get them perfect.

The Interlaced Herringbone was a bit tricky. I still haven't got the underlying herringbone quite right. But I do love the effect of it, particularly when I've used such contrasting colours.

The Queen stitch I'm a bit disappointed with, it just doesn't grab me at all.

I'm also working speciality stitches into Nova which is mainly stitched in Scotch, Mosaic and Tent stitch. Some of the blocks are simple tent stitch in one colour representing quiet areas of the design. There are roughly one or two of these blocks in each row. Now, I want to keep those areas relatively quiet and will minimise the introduction of new thread colours, but what I am going to do is, in something like one block per row, use a speciality stitch for one of these blocks. In this way, I'll also learn new stitches and techniques.

For the first row, I've used Rice Stitch, mainly because at the time I wanted to use a stitch I was already familiar with, but to use it on a larger scale.

Next row, Norwich stitch, I can't wait to give it a go!

Monday, April 30, 2007

Stitching to a deadline

11 comments
I finished my Part 2 of St Petersburg at the weekend, with 2 days to spare before part 3 is released tomorrow. That was cutting it just a bit too fine for me. I’ve decided I really don’t like stitching to a deadline like that. By Friday evening I was just about sick of the sight of Algerian Eyelets and was relieved to get them finished and out of the way early on Saturday.

The deadline was entirely self inflicted as I didn’t get started on part 2 until after I came back from Scotland on the 13th. And yes, I know that it’s not compulsory for me to stitch each part of St Pete within the month when it is released, it’s just me! If I can do it, I HAVE to, and I’ll push myself to do it, getting completely stressed out along the way.


However, from a designer’s point of view, 'deadlines' like this must be very useful. With a large project like St Petersburg, releasing the chart bit by bit ensures interest is retained throughout the length of the project. I suspect the 'drip-feed' approach in this way means more money for the designer.

I’m sure a lot of stitchers would be completely overwhelmed if handed a chart like this all in one go. The 'drip-feed' is therefore also beneficial to the stitcher.

And on the plus side for both stitcher and designer, one design successfully completed this way is likely to encourage the stitcher to come back for more, and to encourage more stitchers in to this way of working.

However, from my point of view, deadlines are all very well, as long as I have plenty of time to keep up with them. I’d never make it as a model stitcher!

Wednesday, April 25, 2007

Inspired by Piglet

3 comments

I've been inspired by Piglet (as in Winnie the Pooh which was in the cassette player in the car) and I'm trying to start each new day thinking "I wonder what will happen exciting today?"

So what did happen exciting today?

The Needlework Show has reopened!

I've bought some stash to stitch Bent Creek's Red Thread snappers.

And lots of lovely people have been leaving comments on my blog! Thanks to every one of you. It really brightens my day when I read all your lovely comments!


Your Brain is Blue

Of all the brain types, yours is the most mellow.
You tend to be in a meditative state most of the time. You don't try to think away your troubles.
Your thoughts are realistic, fresh, and honest. You truly see things as how they are.

You tend to spend a lot of time thinking about your friends, your surroundings, and your life.

Tuesday, April 24, 2007

Stitching alfresco

4 comments
I've picked up my Mystery Huswif again in the last week and am relieved to be enjoying it again! When I last stitched on it, stress at work was translating into stressful stitching at work and I therefore just wasn't enjoying it.

Over the Easter holiday, I decided I needed to get away from my office more at lunchtimes, particularly as I'm so near to a park. So last week, as the weather was good, I took my huswif and went out and sat in the park for a spot of alfresco stitching.

I've made good progress on my huswif, completing band I. I changed a few of the colours and am rather pleased with the result. I've now also started thinking about the alphabet bands that I've omitted and have ideas as to what to put in their place. I particularly fancy doing an interlaced herringbone band.
The light outside really brings the thread colours to life and I liked the design a whole lot more when I saw it outside. The Burnished Gold thread really does look like burnished gold when you see it in good light. The fabric too is a mich nicer colour when seen outside.


But I have a problem with this. A huswif is a sewing accessory and not specifically designed for outdoor use. Most of my stitching takes place indoors and in the evenings when the natural light is fading. So why should I stitch a stitching accessory whose colours I can only really appreciate outdoors?

And who is to say what is the 'true' colour of a fibre or fabric anyway?

I'm glad the alfresco stitching was a success. The wind wasn't too distracting and I didn't see or hear anyone commenting on the wierd woman doing sewing in the park! I went back to work far more at peace with myself than when I'd arrived. Unfortunately, the weather this week isn't so good, so I'm back to office stitching for now!

Any other alfresco stitchers out there?

Oh, and note to self, don't iron spider's web roses again!

Tuesday, April 17, 2007

Mice

12 comments
Apologies in advance if your PC can't cope with this post - there rather a lot of photos!

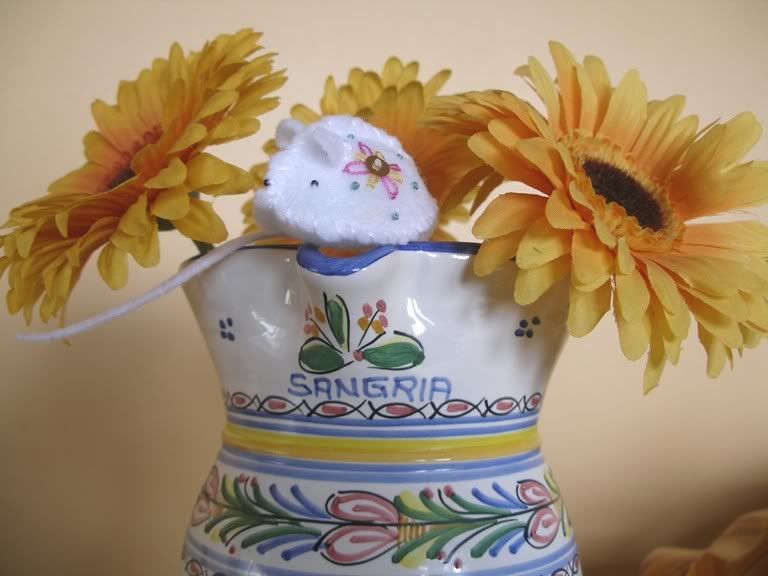
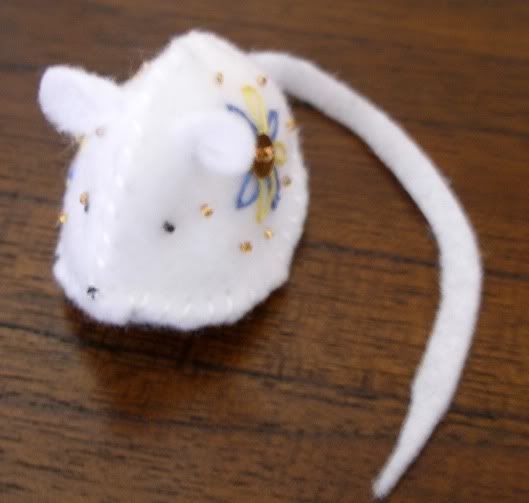
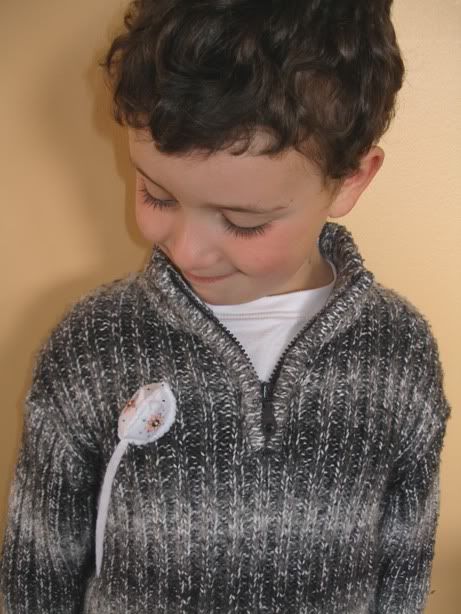
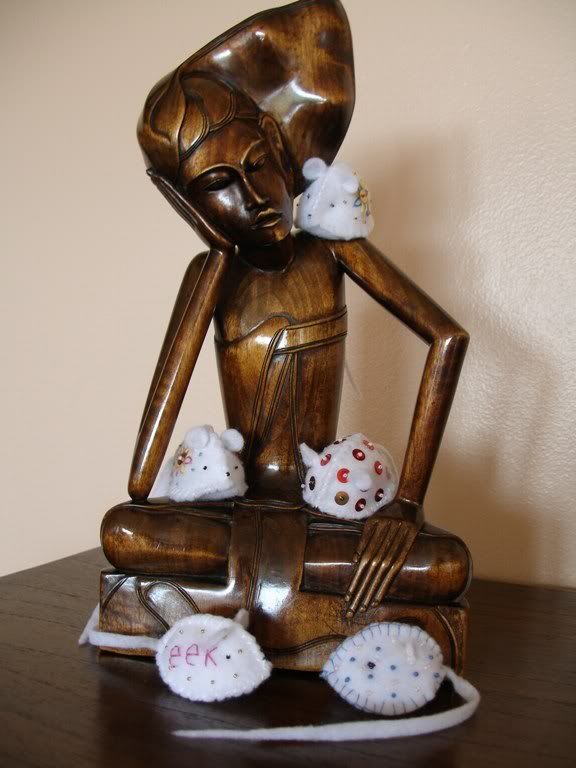
I saw these cute mice on Helen’s blog, Homespun Hearts. I realised, looking at them, that I would see how they were made. So, while I was away last week, I splurged on mouse-making! Now all the women in my family are proud owners of these little cuties!

How do you like the results?


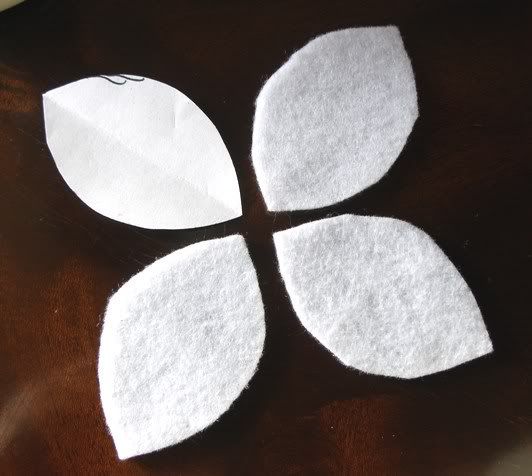
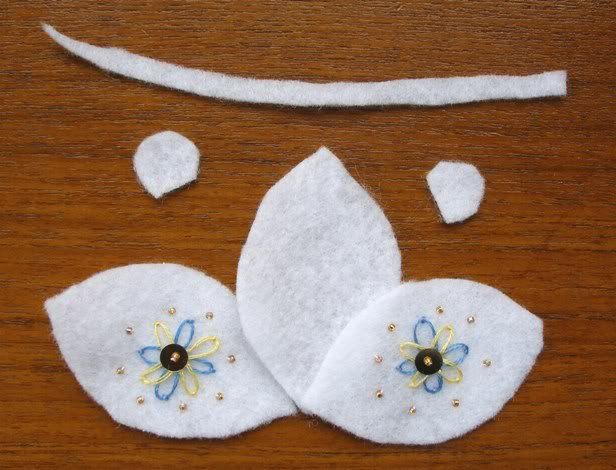
They’re really very simple to make. Each mouse is made from 3 identical leaf shaped pieces of felt, a long thin strip for the tail and a couple of small rough semi-circles for the ears.


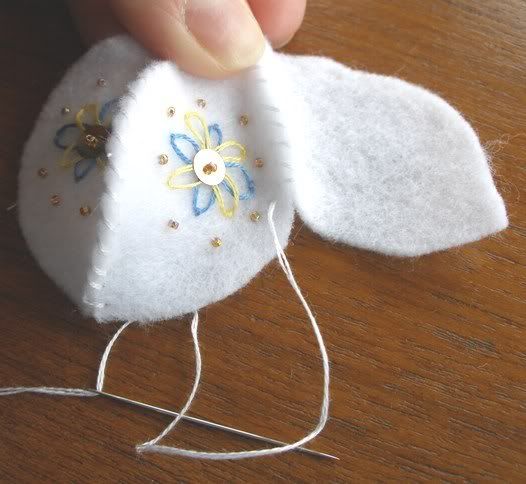
The 3 leaf shaped pieces will form the two sides and belly of the mouse. Before stitching any of the sides together, decorate two of them. Use your imagination here – anything goes – stitching, buttons, sequins – whatever takes your fancy!


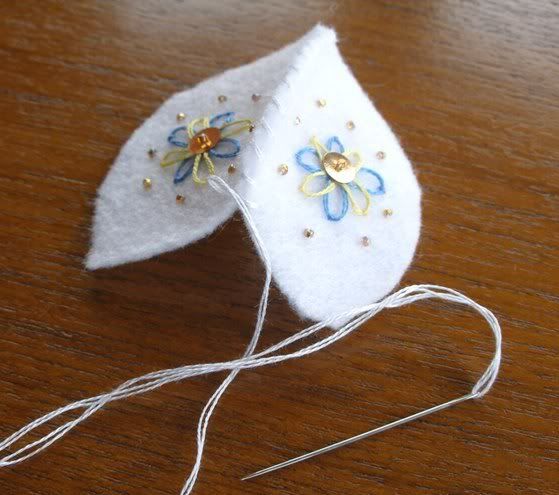
Now take two of the leaf shaped pieces and sew them together down one long edge. I mainly used a thread colour that matched the felt colour, but you could use a contrasting colour. Similarly, I simply oversewed the edges together, but you could use a more decorative stitch. I also used a fairly long piece of thread so that I would be able to use the same thread continuously.


When you reach the end of the two sides, stitch the third side in the same way on to the free edge of one of the first two sides.


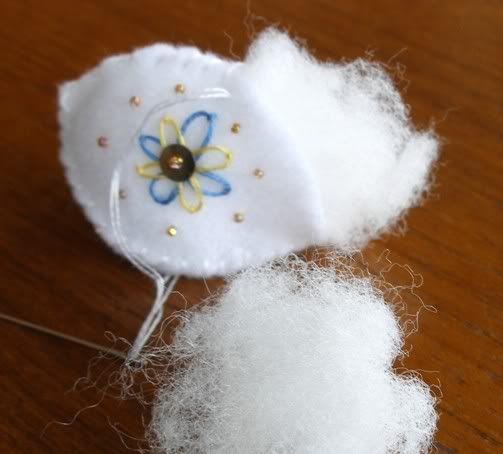
After stitching down this edge, you need to start stitching the remaining free edges together. I often put in an extra stitch or two at the end where all three pieces meet. When you get to about half way along this edge, stop stitching! You don’t, however, need to finish off your thread. You need to stop now and stuff your mouse. I have a little toy stuffing that I use for this kind of thing.


I didn’t stuff my mice too tightly, just enough to add a little padding.

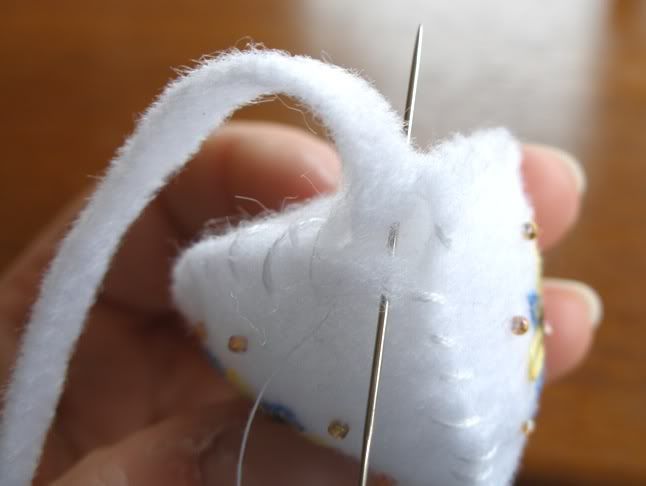
After stuffing, you can continue stitching towards the end of this long edge, but again, stop a stitch or two before the end. In the gap, slide in the mouse’s tail, then fasten the edges of the gap together and add a stitch or two to hold the tail in place.


At this point, I would have an eyeless, noseless and earless mouse! Now I would add the eyes and nose – just a few small black beads or some black thread. Then on to the ears.

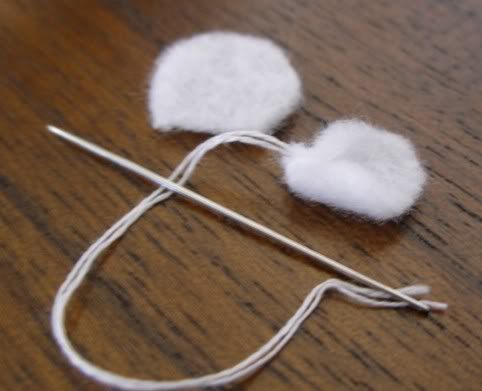
Before attaching the ears to the mouse, I fold the points at the outer edges of the semi-circle of felt in towards the centre of the base and put in a couple of stitches to hold them in place.


Then attach the ears to the mouse.

The mouse is now complete!


A little velcro stitched or stuck to the belly makes a little brooch.


Thursday, April 12, 2007

On Tintock Tap …….

5 comments
I’ve been on holiday from work this week, staying with my parents in south Lanarkshire. The scenery is beautiful, weather great, and as usual, it's going to be a wrench to leave and head down south again tomorrow.

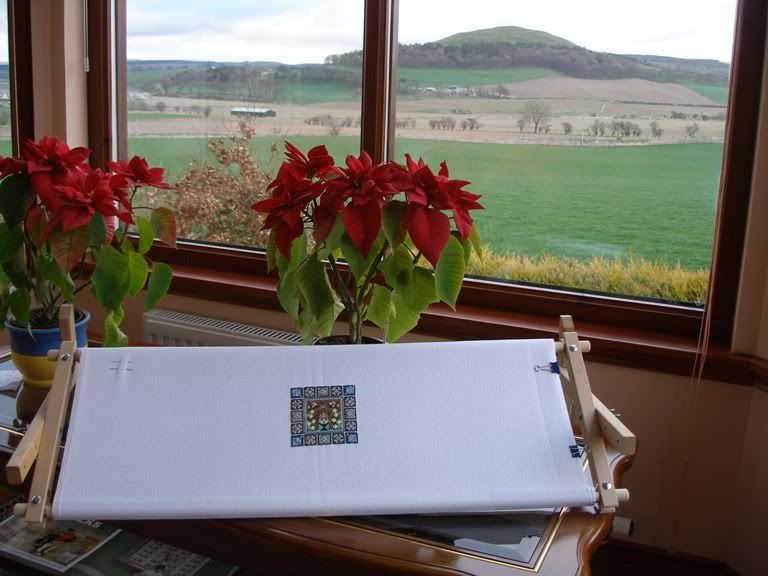
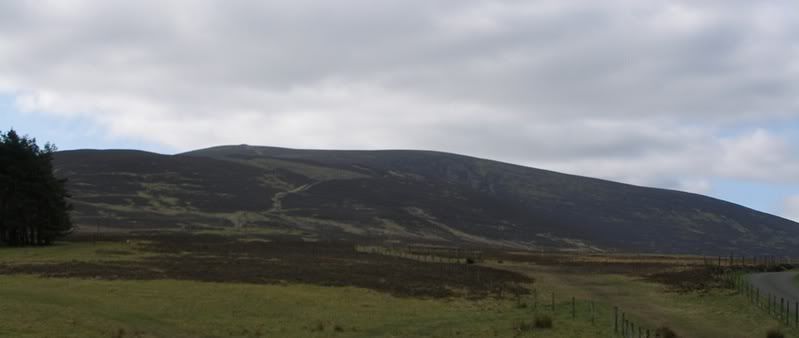
This is the view I have to look out on while doing my stitching –


The hill is Quothquan Law. Behind me and beyond a row of houses and some fields is Tinto.


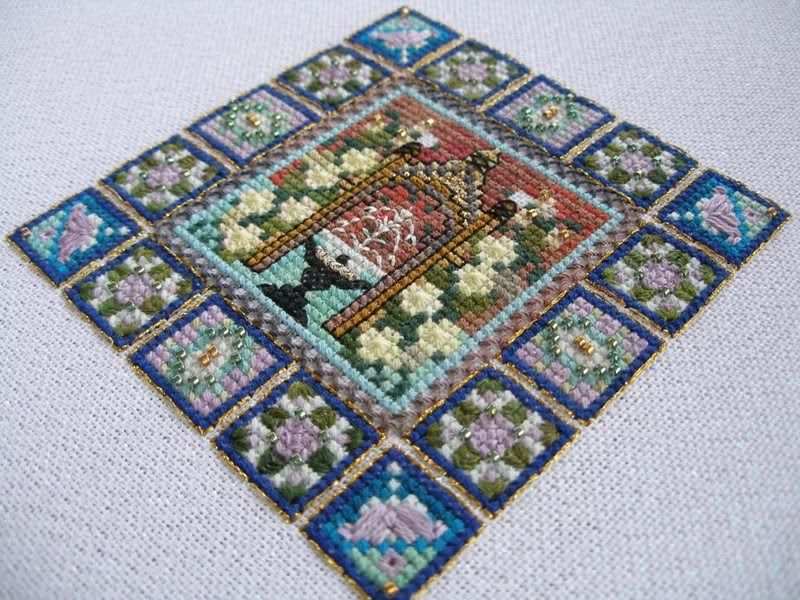
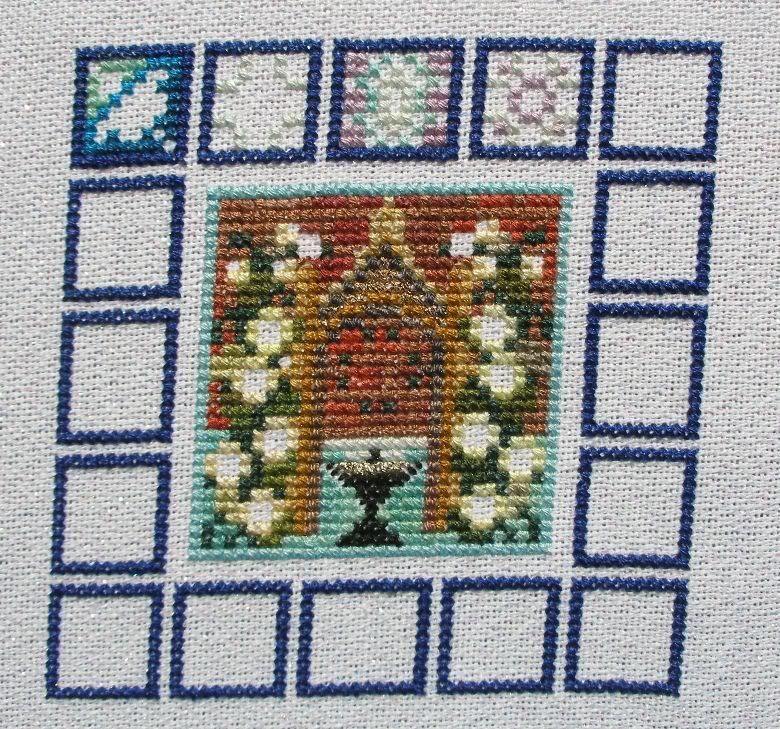
The stitching you may have noticed is Medieval Town Mandala. Despite having part 2 of St Petersburg to work on, I didn’t particularly want to dismantle and transport my huge scroll frame, so MTM it is this week. I’ve now completed part 1, despite a little confusion over the backstitching (despite looking at both colour and black and white charts, I still wasn’t completely certain how it worked). The fountain also took me 3 goes.

Anyway, I’m now making excellent progress on part 2, after checking other stitchers’ work on the Internet to be sure it really does come so close to part 1. I’m not entirely certain of the benefit of the gold backstitching round the blue flower beds in part 1 when the gold border, although a different shade of gold, lies so close in part 2.


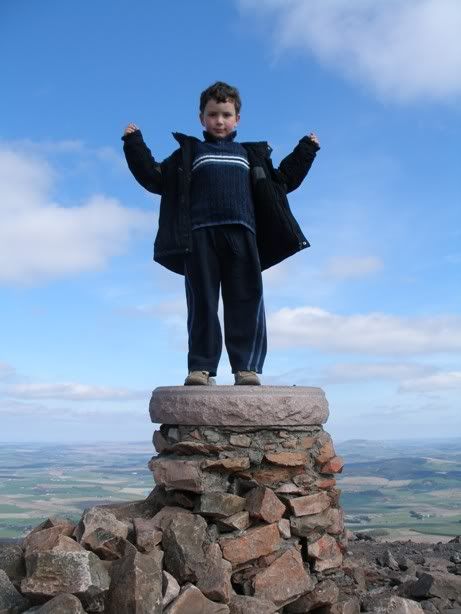
Finally, the doting mum takes over as we climbed Tinto this morning. It’s the first time my 6 year old son has done anything like this and I’m very proud of him!


It’s the cairn on top of Tinto that the Tintock Tap rhyme refers to.

Tuesday, April 03, 2007

March roundup

3 comments
There are a few things I've been stitching that I haven't got round to posting photos of, so I thought I'd sum things up here.

Watergarden - I haven't stitched this since the beginning of March and am going temporarily retire it from my WIP list as others will be taking priority.

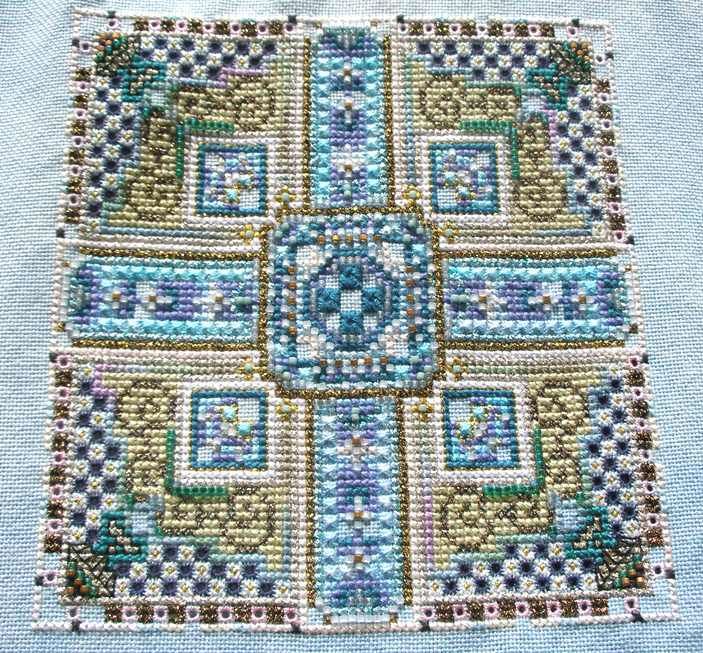
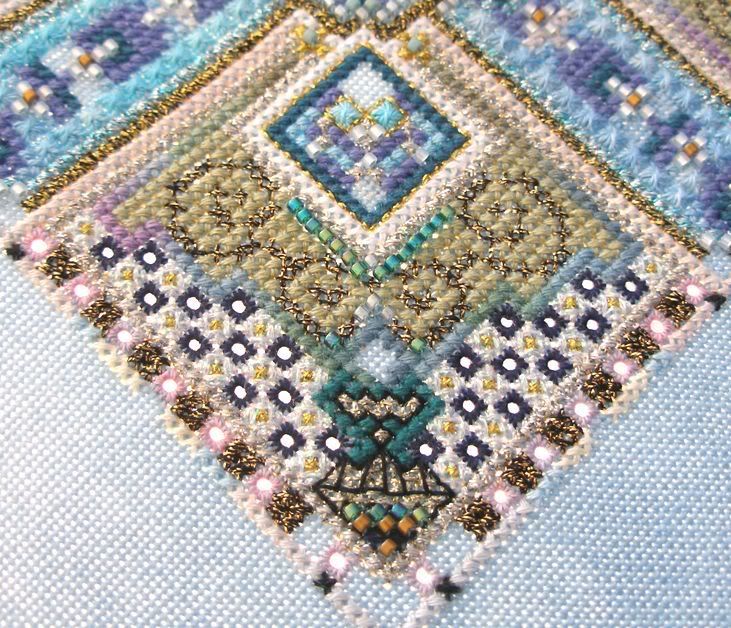
One of the things with all Chatelaines is the amount of beading involved. I didn't fancy the idea of leaving it all to the end, so decided that I'd add the Delicas in stages. At the end of February, I reached a point where I'd finished the central blue section and started the surrounding border, so I decided it was time to do a little beading.


Part 1 of St Petersburg became available at the beginning of March and I was really pleased to complete the stitching and add the Delicas on schedule, even with a week left over at the end of the month! My monster scroll frame made an enormous difference.


Part 2 was released last weekend, so I'm hoping to get started this evening!

In the last week of March, I picked up Medieval Town Mandala again. Actually, I completely restarted it having decided that I really wanted to do it on opalescent fabric. The amount I'd completed previously was minimal, so it wasn't a problem. I'm really pleased with the progress I've made to the extent that I've almost finished part 1 and the photo below is becoming out of date!


I'm also very pleased with the progress I've made on Nova over the last month. In October, I'd completed the first 3 blocks. In March, I added another 7!


On the down side, I haven't been able to keep up with Carol Tinson's Huswif as I would have wished. Part 3 is due this month, and I've only just finished part 1. This one has been my lunch time stitching at work where I've been feeling a bit stressed and not much like stitching recently. Sometimes even, it feels like the stitching adds to the stress. It gets confusing when I actually enjoy doing it yet feel stressed by it at the same time. So I think I may take a break from the lunchtime slot for now. Maybe when the weather is better, I'll get out to the park at lunch time and do a little stitching there. Sorry I don't have an updated picture!

Wednesday, March 28, 2007

Tin finish

5 comments
Recently I finished "Lorri's Heart" Tin for a friends birthday.


It looks very pretty and I'm really pleased with the way it turned out as it's the first piece I've finished as a tin top. My friend really liked it too.

I got the design as a kit with everything I needed, including the tin. The first step was to stitch the top as normal. At this point I discovered some really horrible silky thread in the kit that was absolutely awful to stitch with. I'm not even completely certain what it was - in one place it's referred to as White Silk Mori and elsewhere as Creme Silk from Needle Necessities.

Whatever it was, it was really horrible to stitch with - the strands kept separating and slipping out of my needle and turning into a yucky fluffy tangle! However, as I'm fairly new to stitching with silk, I've no other white silk in my stash. I therefore persevered as I wanted to retain the effect of the sheen of the silk.

I also found that the chart could potentially be misleading as one of the symbols used for the beads, a dot, was also used to indicate the position of the Rhodes butterflies on the chart.

However, despite these drawbacks, I think it was certainly worth the effort.


Finishing the tin was fairly simple, if a bit fiddly.

You mark the shape of the tin on to a piece of card and cut it out. The stitched piece is then attached to the card and then this stuck to the tin. However, between the card and the stitching you need some padding - I used a couple of layers of white felt. The stitching is then attached to the padded card with a mixture of glue and lacing to get a nice firm fit and ensure none of the edges of the fabric show round the edges of the card.

Finally, you can run a length of fine cord around the top of the tin to hide the area where the tin and the stitched top meet - it makes a much neater finish.

You can also cover other parts of the tin. As the tin was red, I covered those parts of the tin top that would still be visible after the stitched top was added with a layer of white felt. A finer, better quality fabric or ribbon would give a finer, more professional finish, but I was quite happy with the felt. Another time, I'll try something different.


Thanks to everyone who commented on my monster scroll frame! It really has made an enormous difference to my stitching and have finished part 1 of St Petersburg (photos to come soon).

Trish asked about the tension of the fabric on the rods - I confess that is an area needing fine tuning! The tension of the fabric is not consistent across the width of the frame. However, so far, it hasn't annoyed me sufficiently that I've done anything about it. I suspect that the curtain tape hasn't been attached to the rods in a straight enough line. Either I'll have to loosen off everything and re-attach the tape, or I might try rolling an extra piece of fabric round the rods beside my stitching fabric to tighten things up at bit.

Anyway, flushed with enthusiasm over this success and the luxury of being able to use both hands properly while stitching (no man-handling a scroll frame now it's on a stand), over last weekend, I drilled 5mm holes in the side bars of my 30 inch scroll frame (on which I have Medieval Town Mandala) so that I could attach the same stand/legs to this frame too. I'm not sure that I'm very good at drilling holes in a straight line, but the end result works a treat and I'm making excellent progress on MTM while waiting for part 2 of St. Pete.


Your Element Is Air

You dislike conflict, and you've been able to rise above the angst of the world.
And when things don't go your way, you know they'll blow over quickly.

Easygoing, you tend to find joy from the simple things in life.
You roll with the punches, and as a result, your life is light and cheerful.

You find it easy to adapt to most situations, and you're an open person.
With you, what you see is what you get... and people love that!