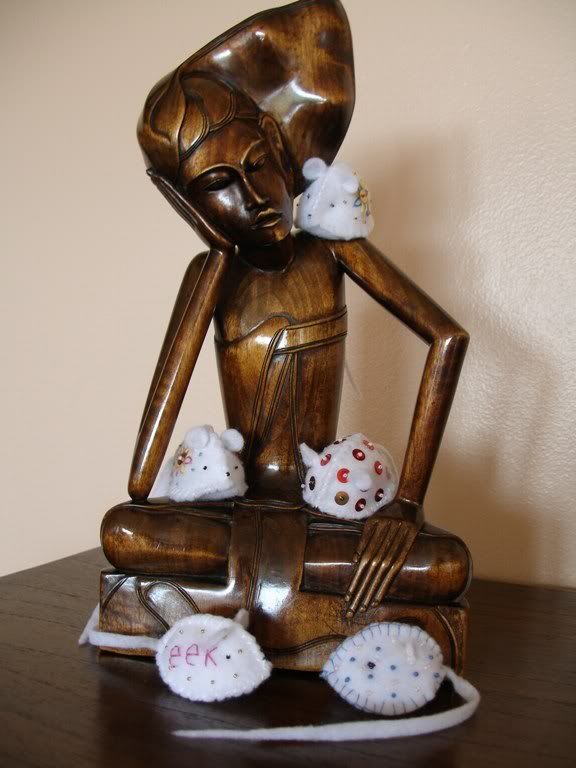
I saw these cute mice on Helen’s blog, Homespun Hearts. I realised, looking at them, that I would see how they were made. So, while I was away last week, I splurged on mouse-making! Now all the women in my family are proud owners of these little cuties!
How do you like the results?

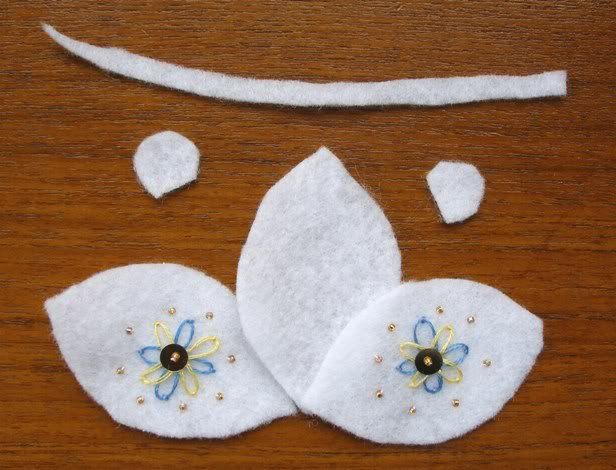
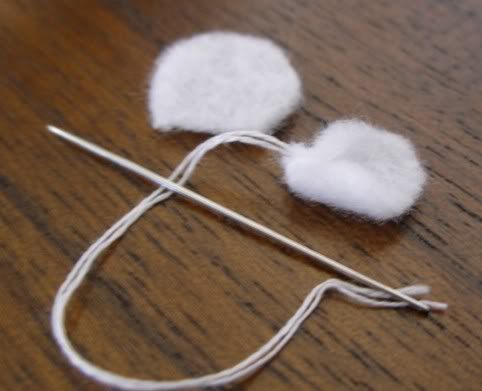
They’re really very simple to make. Each mouse is made from 3 identical leaf shaped pieces of felt, a long thin strip for the tail and a couple of small rough semi-circles for the ears.
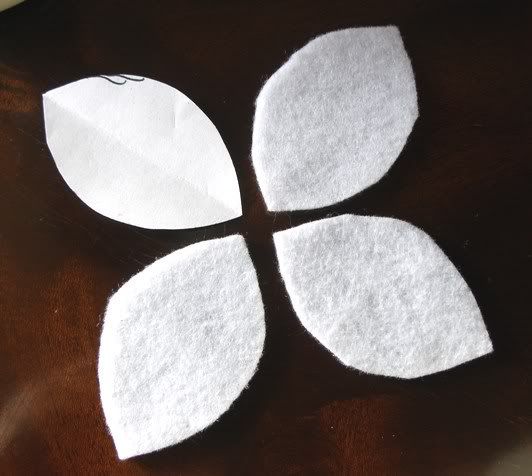
The 3 leaf shaped pieces will form the two sides and belly of the mouse. Before stitching any of the sides together, decorate two of them. Use your imagination here – anything goes – stitching, buttons, sequins – whatever takes your fancy!
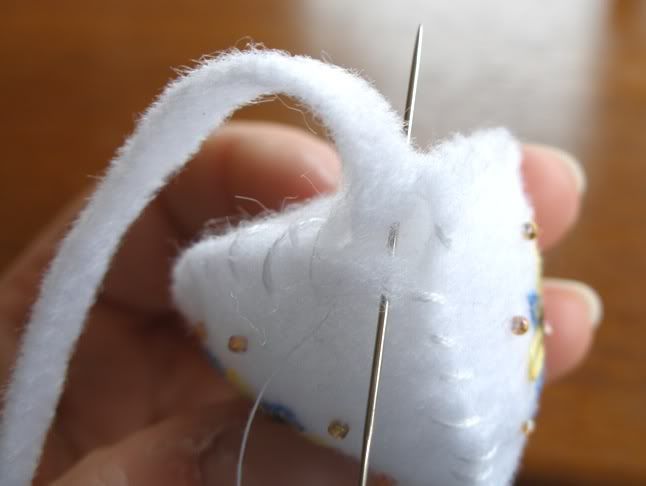
Now take two of the leaf shaped pieces and sew them together down one long edge. I mainly used a thread colour that matched the felt colour, but you could use a contrasting colour. Similarly, I simply oversewed the edges together, but you could use a more decorative stitch. I also used a fairly long piece of thread so that I would be able to use the same thread continuously.
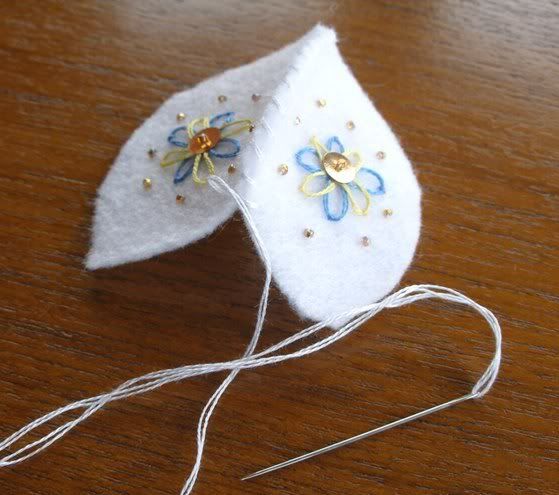
When you reach the end of the two sides, stitch the third side in the same way on to the free edge of one of the first two sides.
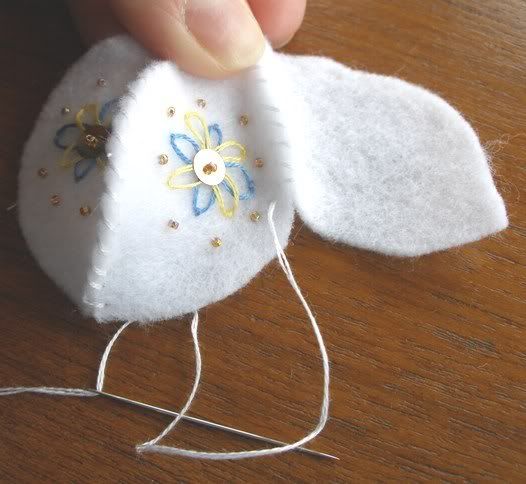
After stitching down this edge, you need to start stitching the remaining free edges together. I often put in an extra stitch or two at the end where all three pieces meet. When you get to about half way along this edge, stop stitching! You don’t, however, need to finish off your thread. You need to stop now and stuff your mouse. I have a little toy stuffing that I use for this kind of thing.
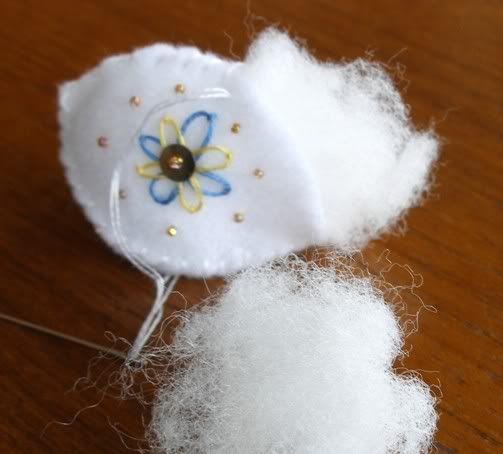
I didn’t stuff my mice too tightly, just enough to add a little padding.
After stuffing, you can continue stitching towards the end of this long edge, but again, stop a stitch or two before the end. In the gap, slide in the mouse’s tail, then fasten the edges of the gap together and add a stitch or two to hold the tail in place.
At this point, I would have an eyeless, noseless and earless mouse! Now I would add the eyes and nose – just a few small black beads or some black thread. Then on to the ears.
Before attaching the ears to the mouse, I fold the points at the outer edges of the semi-circle of felt in towards the centre of the base and put in a couple of stitches to hold them in place.
Then attach the ears to the mouse.
The mouse is now complete!
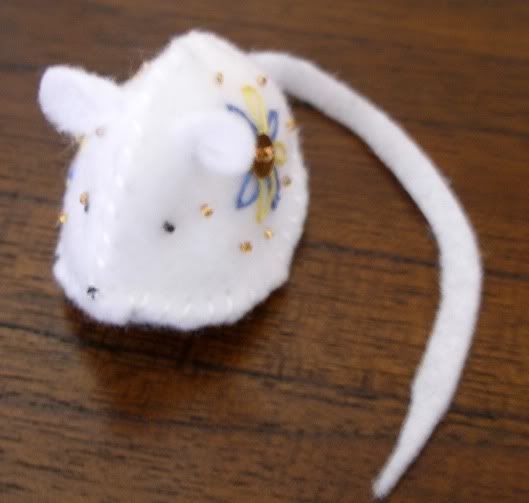
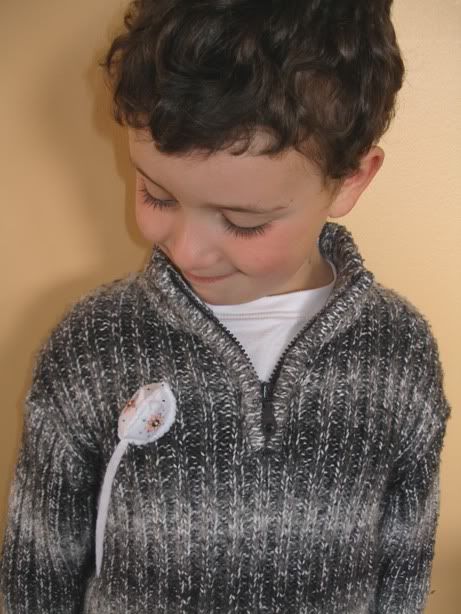
A little velcro stitched or stuck to the belly makes a little brooch.
12 comments:
thanks for the tutorial!!
the mice you made are very cute
Hey, thanks for visiting my blog. I love the mice you made, they're adorable. I've looked back at your stitching and you have some BIG projects going and your stitching looks gorgeous. I'll be back to visit again ;)
Oh your mice are adorable - I've asked my mum to make me some as I'm hopeless with felt stitching.
what cute little mice, I'm going to have to make some now that I've seen these lol
Thanks for the instructions :)
Ooh they're great! Very cute. Thanks for the instructions
Very cute
awww they are cute, thanks for the instructions
Lovely blog, so many nice photos. The mice are adorable, I need more time in my life to get those done, but I will admire yours!
Take care,
Petra
What adorable little mice! And why have I not discovered your blog before? I shall have to visit again for these little gems. :)
Great tutorial on the mice you have here :-)) I've directed a couple of people here to take a look. Everything is pretty much the same as mine and you have done a fab job of them. I'm pleased you have enjoyed making them.
You have a very nice blog and I will be back again, thank-you for visiting mine :-) it is nice to 'meet' you :-))
Thank you so much for doing th tutorial page, I love it. Great Blog.
Oh I sooooo love these cuties, I am going to have a go at stitching these!
Post a Comment